🧭 How to Add a YAESUBT Bluetooth Interface in Windows
(Step-by-step tutorial with screenshots)
The YAESUBT Bluetooth Interface lets you connect your Yaesu transceiver wirelessly to your PC, laptop, or tablet — no CAT cables required! This guide shows how to pair the YAESUBT device with Windows and set up the SPP (Serial Port Profile) COM port for use with your favorite ham radio software.
Connect a Power supply to the YAESU Bluetooth Interface. The Blue led will blink fast if not connected. Also ready for binding.
🪟 Step 1 — Open Bluetooth Settings
Press ⊞ Win + R to open the Run dialog.
Type: ms-settings:bluetooth
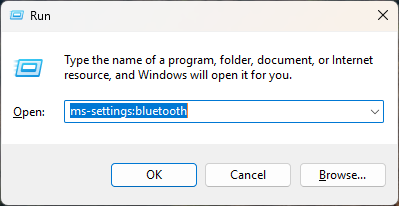
This opens the Windows Bluetooth & Devices settings page directly.
Or
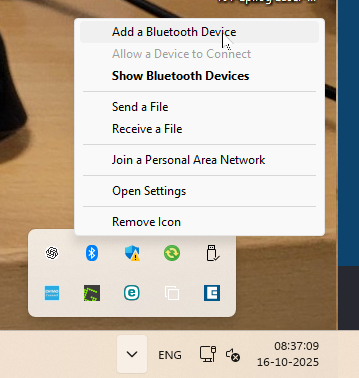
Right click the Bluetooth Icon in the Taskbar to open the Windows Bluetooth & Devices settings page.
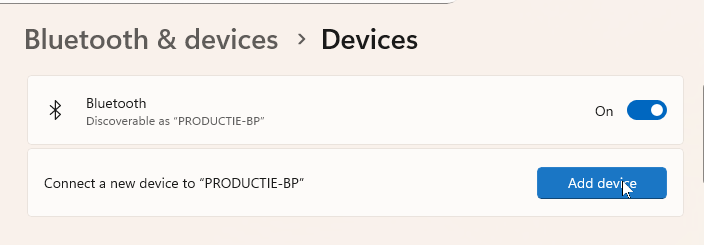
🔍 Step 2 — Start Adding a New Device
Make sure you bluetooth adapter is Enabled “ON”
Click on “Add device” to start pairing a new Bluetooth device.
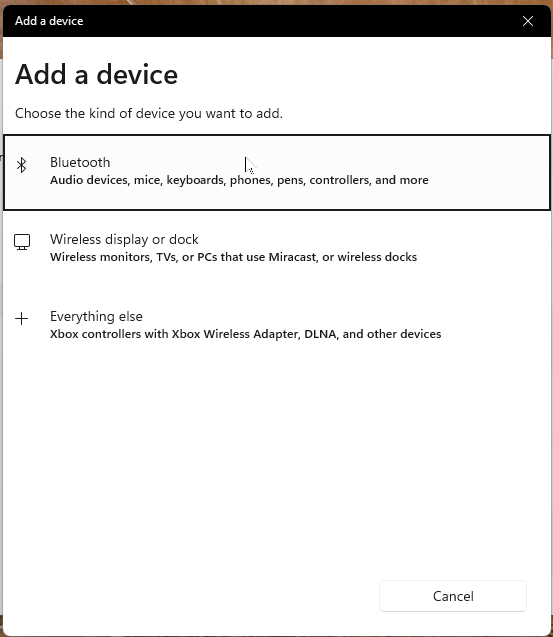
📡 Step 3 — Choose “Bluetooth”
In the Add a device window, select the first option: Bluetooth.
🔎 Step 4 — Show All Devices
If you don’t immediately see your YAESUBT interface, click “Show all devices” to refresh and display everything nearby.
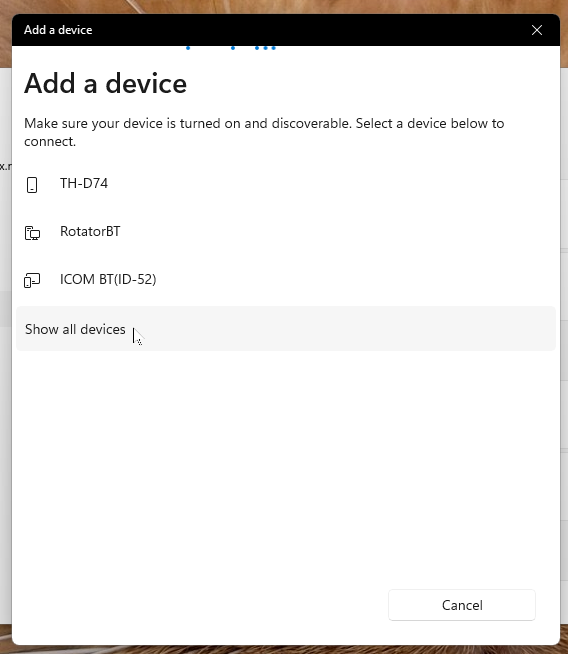
Make sure your YAESUBT module is powered on and visible (for example, by powering on your transceiver or interface board).
🎯 Step 5 — Select the YAESUBT Device
You should now see something like YAESUBT-XXXXX (where XXXXX are random digits or letters).
Click on it to start pairing.

🔢 Step 6 — Enter the PIN Code
When prompted for a PIN, enter the code provided with your interface — 1234
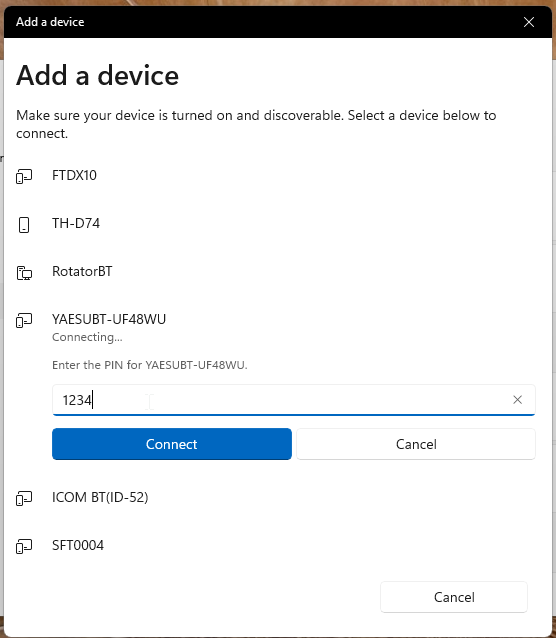
After entering the code, click Connect.
✅ Step 7 — Device Ready!
Windows will confirm that your YAESUBT device is successfully paired and ready to use.
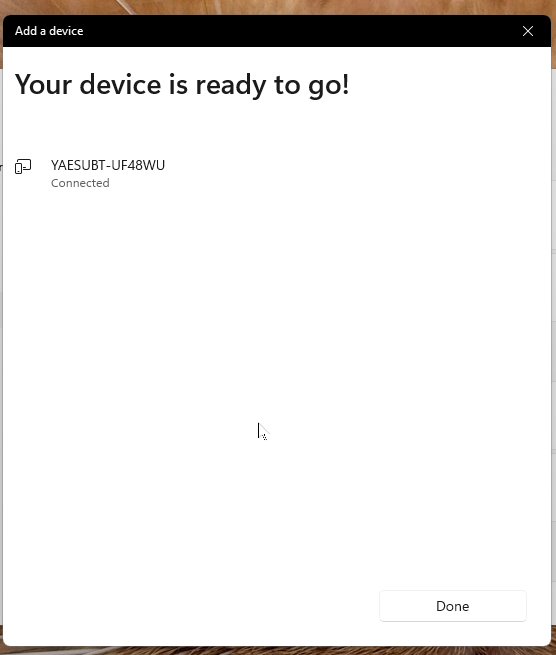
You can now close the Add Device window.
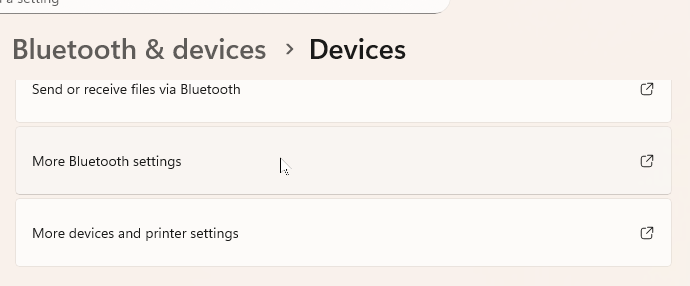
⚙️ Step 8 — Open More Bluetooth Settings
Go back to the main Bluetooth page and scroll down.
Click “More Bluetooth settings” to open the classic Bluetooth control panel.
🧩 Step 9 — Check the COM Port
In the Bluetooth Settings dialog, go to the COM Ports tab.
Here you will see a Serial Port (SPP) entry — this is your virtual COM port for CAT control.
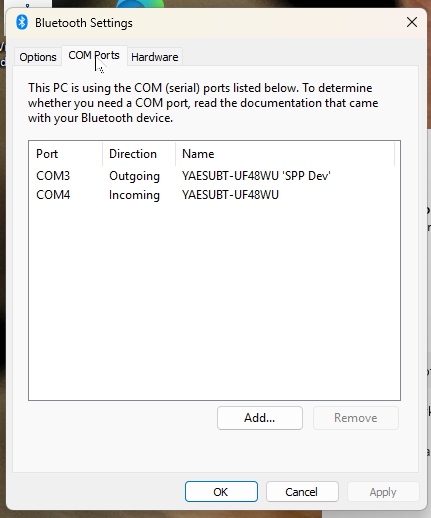
Tip: Note down the COM port number (e.g., COM3).
You’ll need this when configuring your ham radio software (e.g., WSJT-X, FLRig, or MiniBook).
🛠️ Optional — Verify the Connection
Open your radio control software and select the same COM port you noted above.
Set the baud rate to match your radio (38400 baud) and make sure RTS is set to OFF in the radio menu.
🎉 Done!
Your YAESUBT Bluetooth Interface is now fully paired and ready to use in Windows.
You can control your transceiver wirelessly for logging, CAT control, or digital modes — no USB cable required!
When opening the serial port, the blue led will stop fast blinking and switches over to slow pulsating blinking.
Important: Make sure your radio is properly configured.
Set the CAT baud rate to 38400 baud and make sure CAT RTS is OFF in your radio’s menu.
Tips & Troubleshooting
-
If the device doesn’t appear, make sure Bluetooth is enabled and the interface is in pairing mode.
-
Remove any previous YAESUBT entries before re-pairing.
-
Some older Windows versions may list the SPP COM port only after a restart.