Skip to content

PD5DJ

Amateur Radio Station

Menu
  • Home
  • Info
    • Info
    • History
    • QSL Information
  • MiniBook Guide / Gids
    • MiniBook
      • Handleiding MiniBook
      • MiniBook Guide
      • Install MiniBook
      • MiniBook main window
        • MiniBook My Station / My Activation
        • MiniBook QSO Field / Veld
        • MiniBook – Activation reference input / Activatie referentie invoer
        • MiniBook DXCC & QRZ Lookup
        • MiniBook Worked Before window / venster
        • MiniBook – Status & Buttons
        • Special Functions / Speciale functies
    • Hamlib Server
      • HamlibServer Setup
  • XLX880 Reflector
  • Activations / Contesting
    • Fieldday Juli 2th – 2017 with PD5TG
    • Mills on the air 2016
    • PI4WFL/KITE June 6th 2016
    • PACC Contest PA6NH – 2015
    • VHF Contest 2006 – Petten
  • Projects
  • For Sale/Tekoop
  • Contact
Menu

Create precision OSL loads yourself

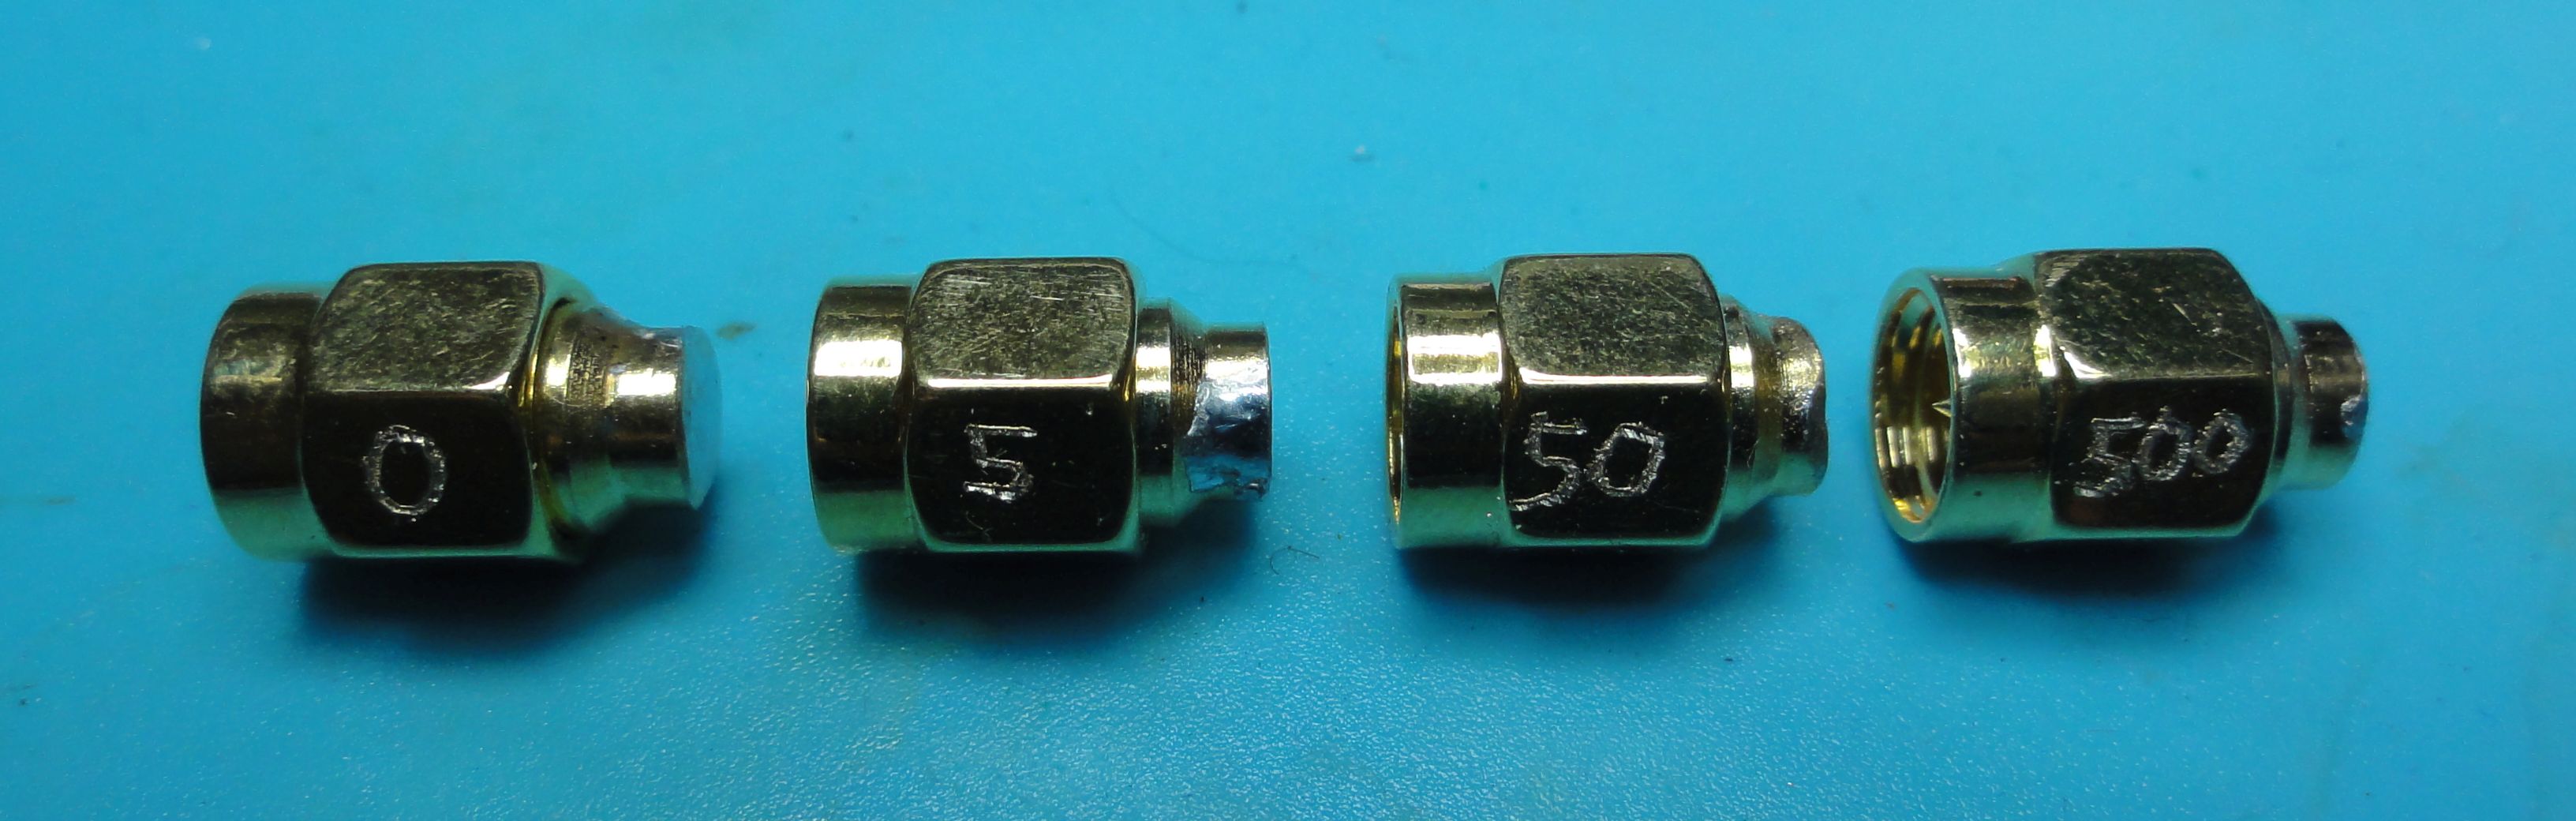
To be able to calibrate the Analyzer properly (OSL), we need accurate loads.
It is also important that the loads function well over the entire spectrum, show no reflections or have other characteristics than a good load.
This is quite easy to make yourself.
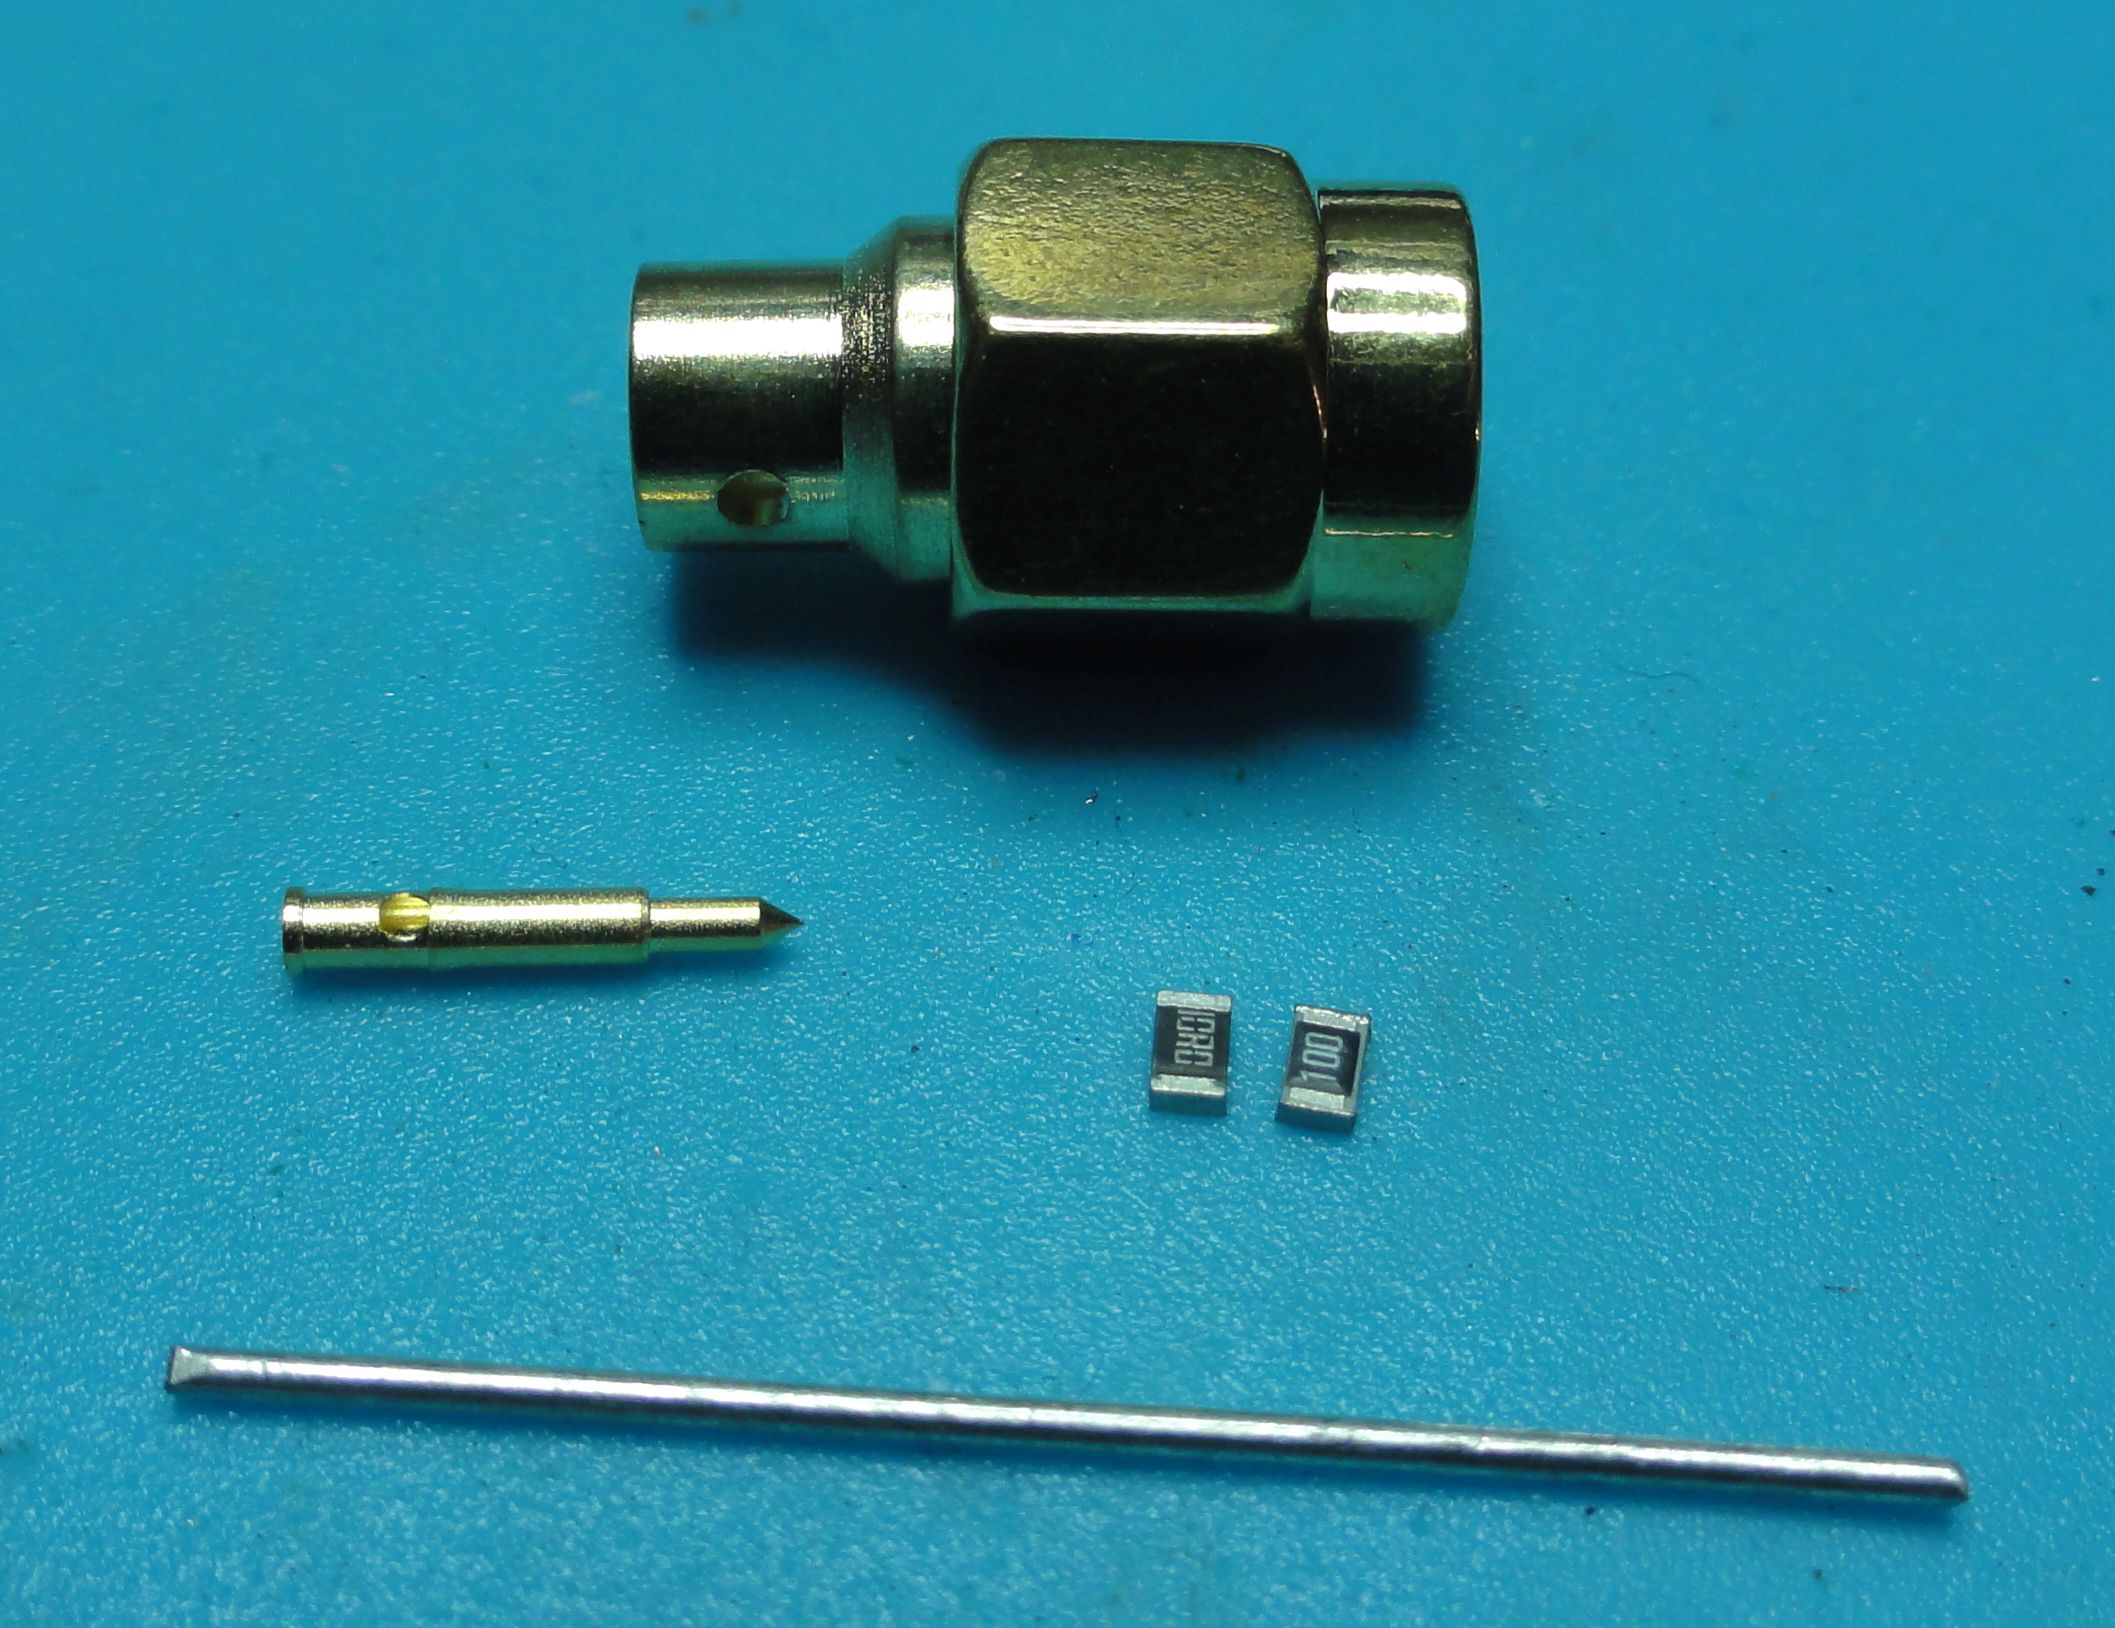
What you need are the following materials:

  • SMA connector (for semirigid)
  • 2x resistors SMD 0805 1% or even better 0.1%
    5ohm (2x10ohm)
    50ohm (2x100ohm)
    500ohm (2x1000ohm, 1k)
    Short (piece of wire)
  • Piece of wire

First we will solder the equal resistances parallel to each other, using tweezers and a small solder tip.

Then, we fix the SMA center pin somewhere in, (in my case a silicone mat)

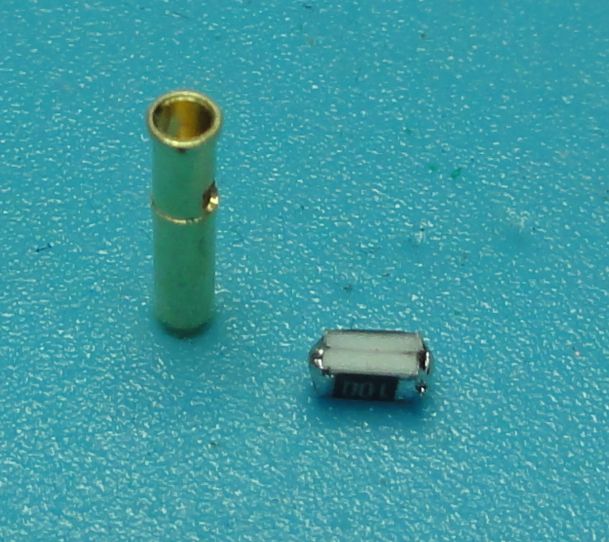
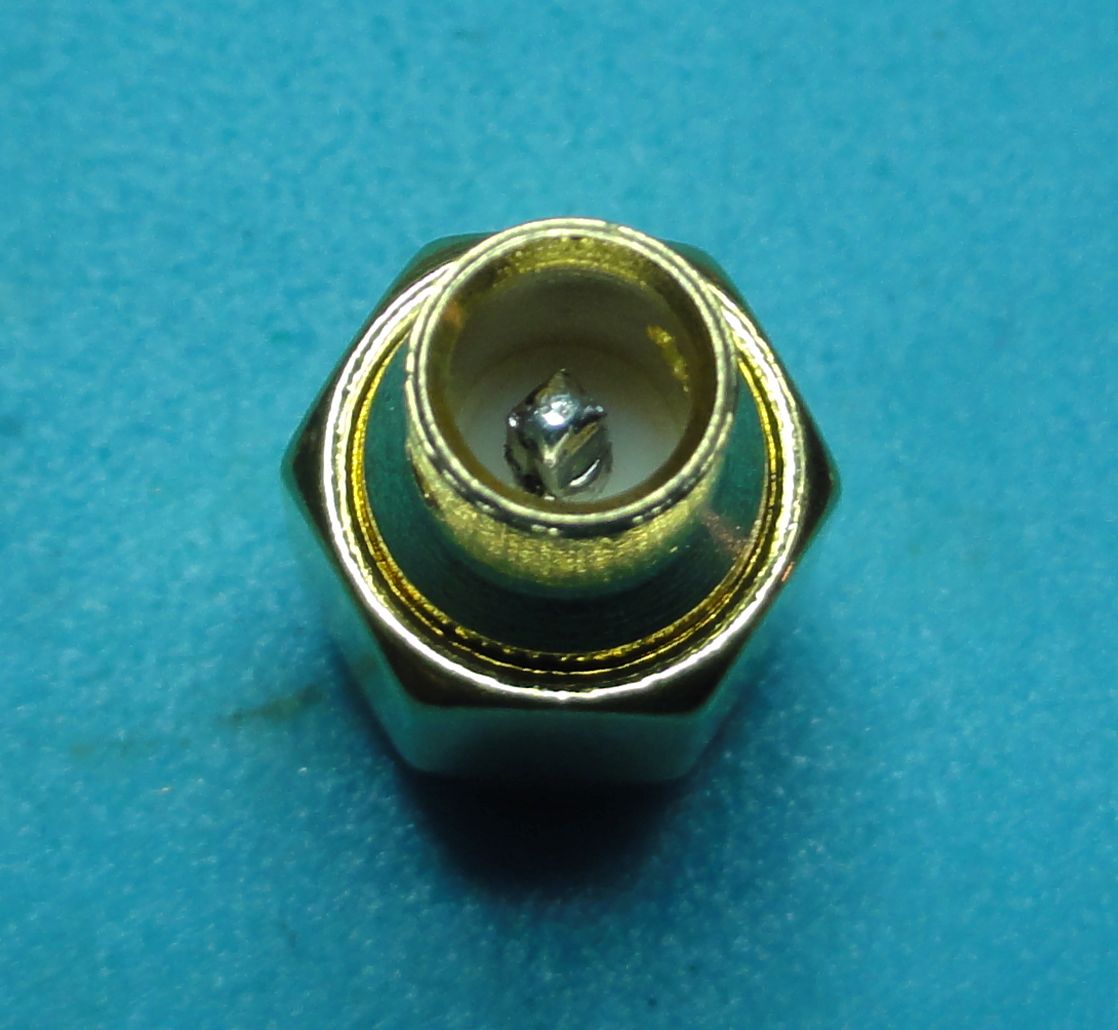
Now we solder the parallel soldered resistors RIGHT on the center pin of the SMA connector.

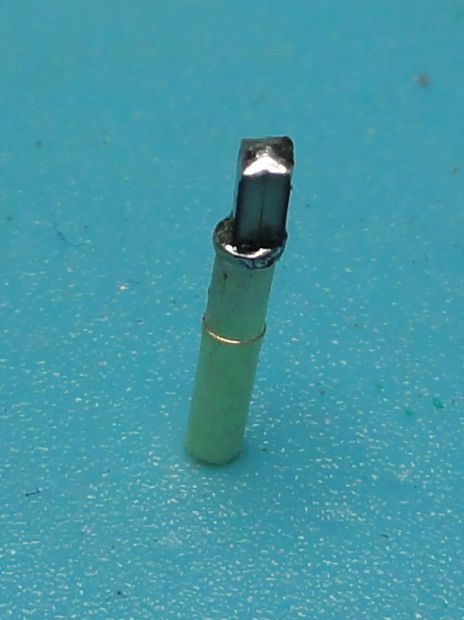
Then we press the center pin into the SMA connector itself.

Now take the piece of wire, and cross it through the holes of the SMA connector, the wire comes out exactly above the parallel soldered resistors.

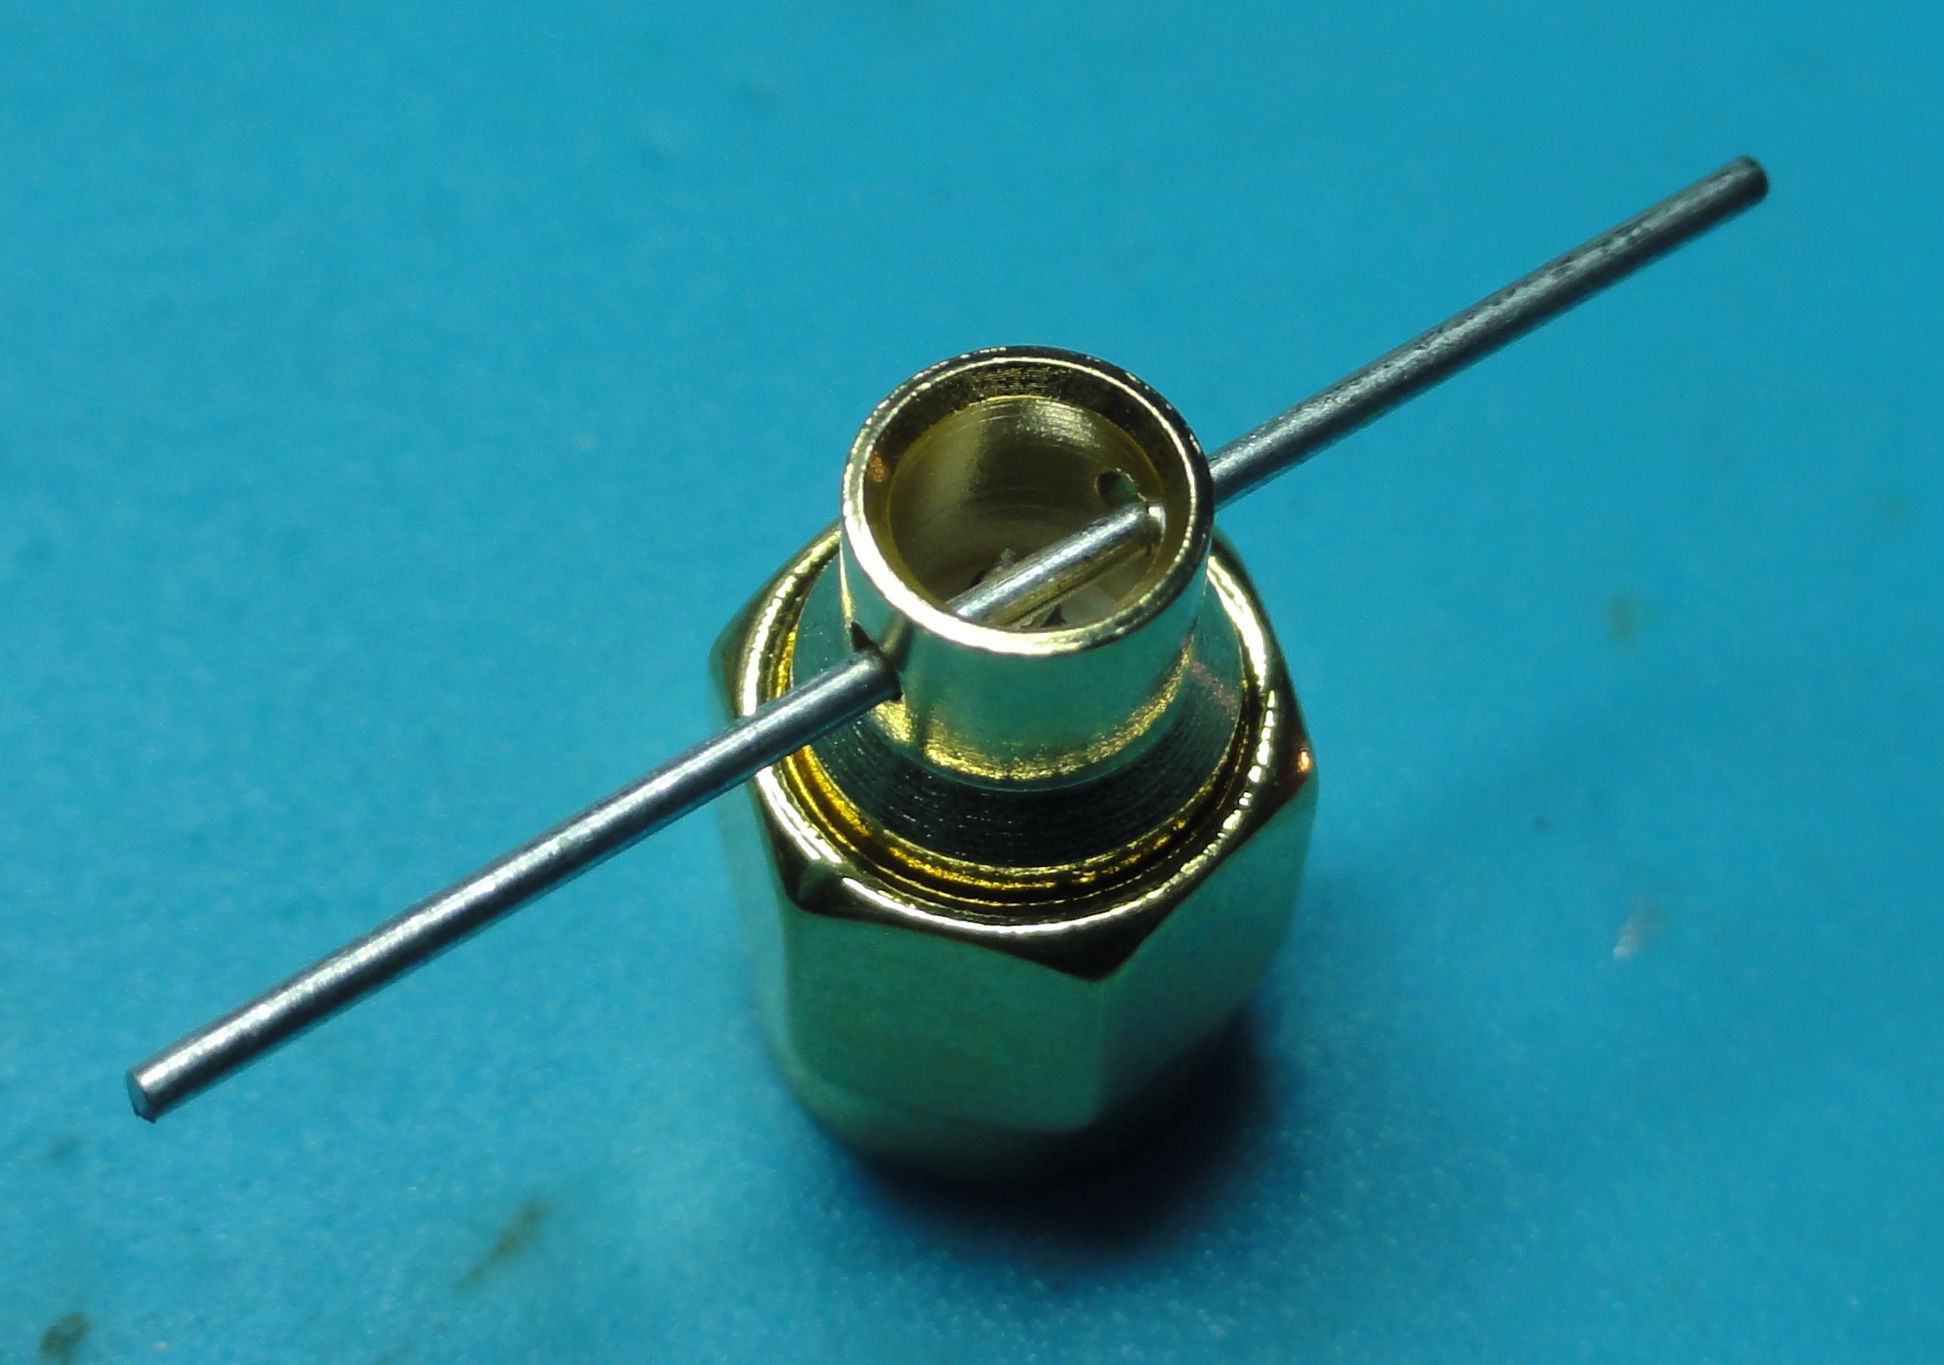
Now we carefully solder the SMA connector, look during the soldering that the resistors connect to the piece of wire.

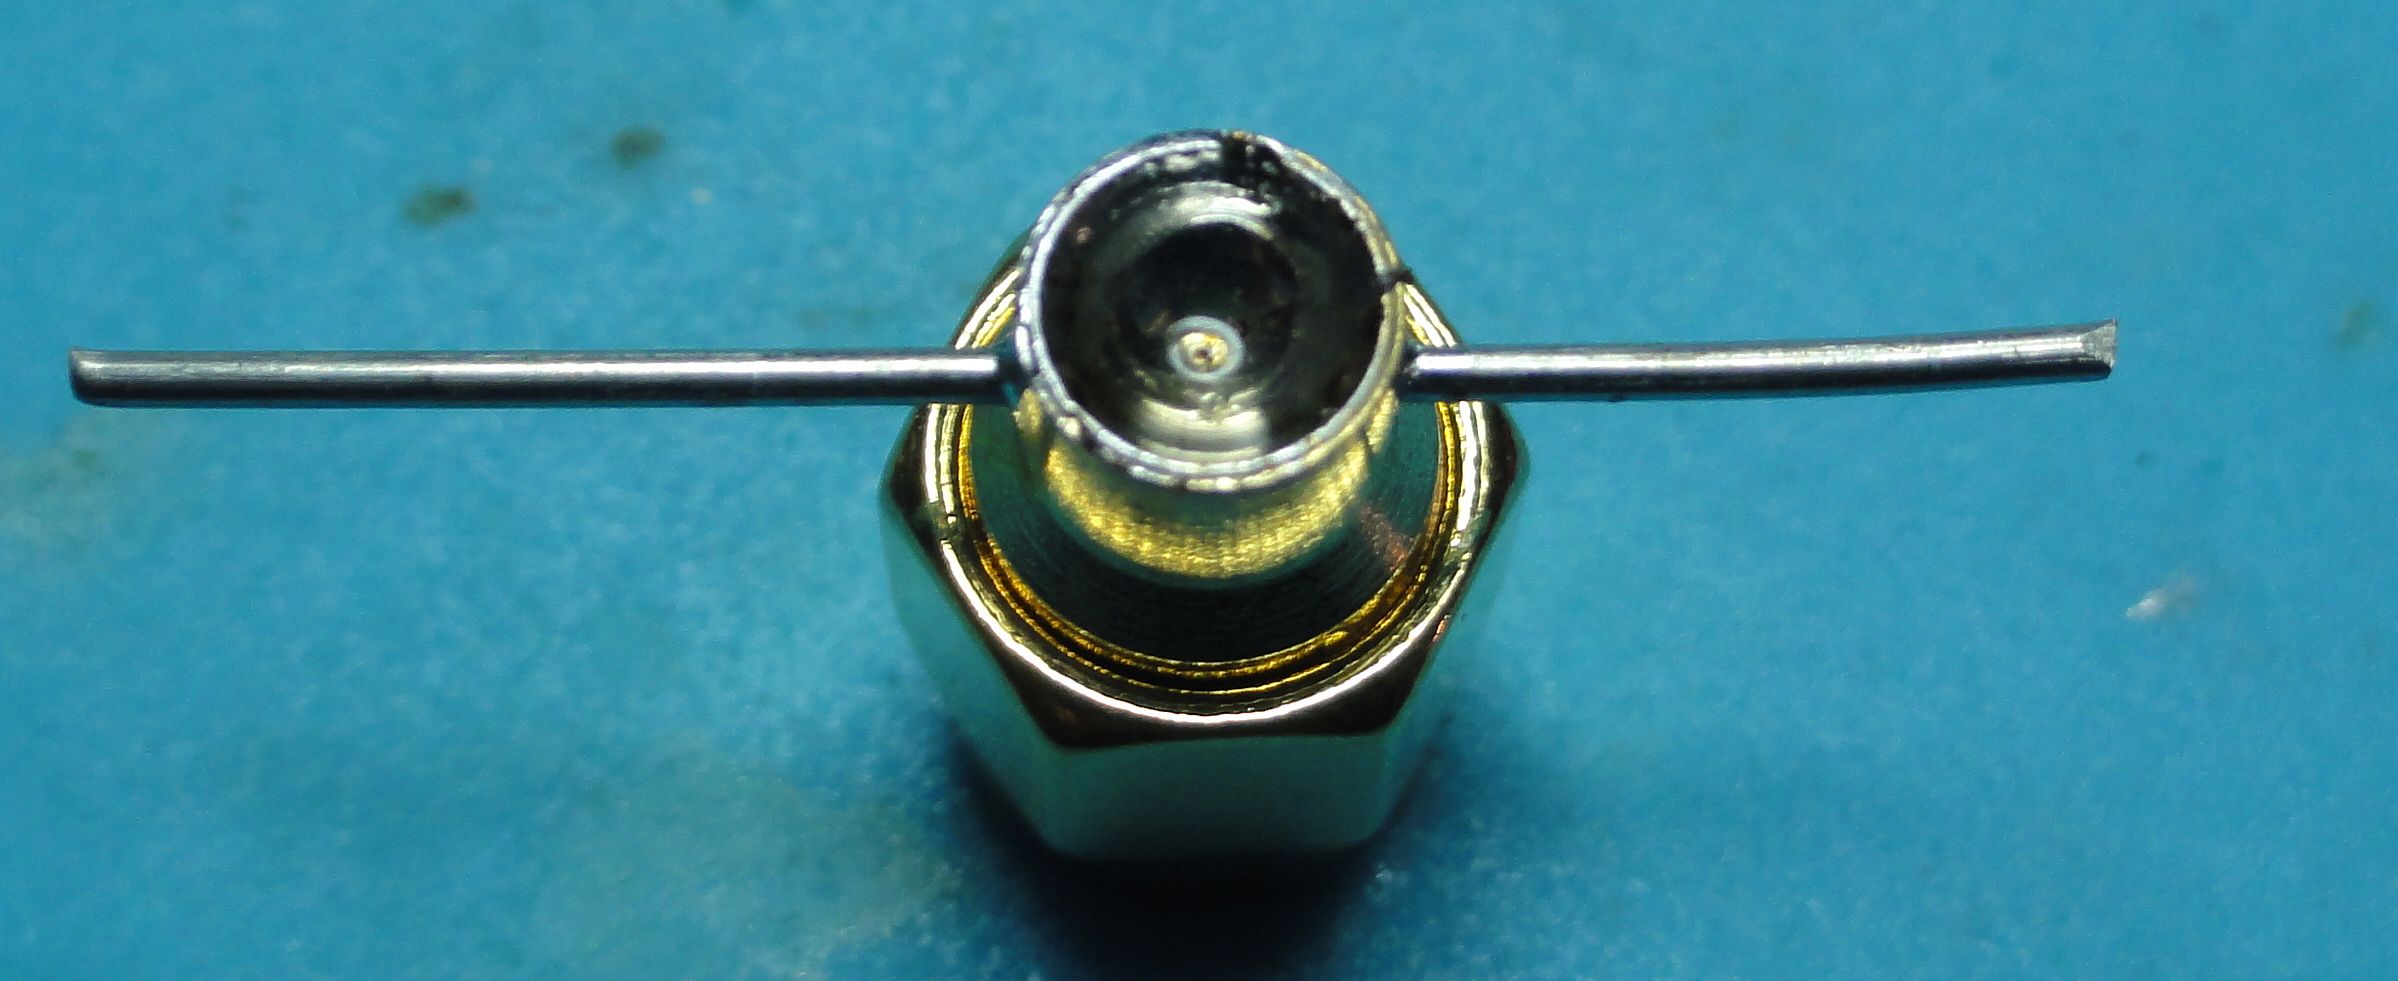
Now cut the pieces of wire, and file the whole completely flat to the pierced wire.

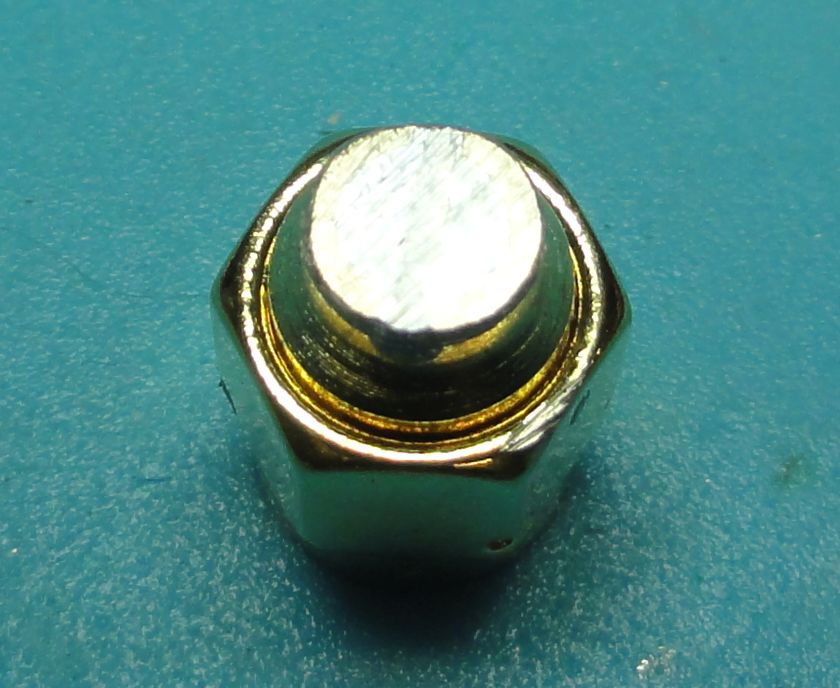
Do the same for all loads, and mark them with a color or in my case I engraved the loads.

Latest Posts

  • Tutorial : Yaesu bluetooth interface pairing in windows
  • YAESU Bluetooth Interface
  • Frame build for Yaesu FTdx10
  • Fieldday weekend and visit to PC5T on TEXEL EU-038
  • V Dipole 40m Expansion kit

Catagories

  • Accesoires
  • Amateur Television
  • Announcements
  • Antennas
  • Contesting
  • Digimodes
  • Events
  • Homebrew
  • Info
  • Logbooks
  • Measuring
  • MiniBook
  • Packet Radio
  • Portable
  • Projects
  • Propagation
  • Refurbishing
  • Satellite
  • Software
  • Uncategorized

Archives

  • October 2025
  • September 2025
  • August 2025
  • June 2025
  • May 2025
  • April 2025
  • March 2025
  • January 2025
  • November 2024
  • October 2024
  • September 2024
  • August 2024
  • July 2024
  • June 2024
  • May 2024
  • April 2024
  • March 2024
  • November 2023
  • October 2023
  • September 2023
  • August 2023
  • July 2023
  • June 2023
  • May 2023
  • April 2023
  • January 2023
  • December 2022
  • October 2022
  • August 2022
  • July 2022
  • June 2022
  • May 2022
  • April 2022
  • March 2022
  • August 2018
  • July 2018
  • June 2018
  • May 2018
  • April 2018
  • March 2018
  • December 2016
  • November 2016
© 2025 PD5DJ | Powered by Superbs Personal Blog theme