First attempt to build a 23cm Yagi
I had been looking for an antenna for 23 and 13cm for a while now.
As I wanted to listen to SSB and Amateur Television stations.
Now I had found some factory antennas online. Only the price.. hmmm..
For these prices I can build several antennas myself 🙂
And so it happened!
I had found a handy tool from my Australian counterpart VK5DJ 🙂
A nice software calculation tool for Windows.
Page link: https://www.vk5dj.com/yagi.html
Direct Download of YagiCalculator: https://www.vk5dj.com/SetupYagiCalculator.exe
The antenna I finished first was the 23cm version.
I wanted to be resonant at 1275Mhz, this is somewhat the center of the spectrum I am interested in.
As I do a lot of 3D printing, we shall use it!
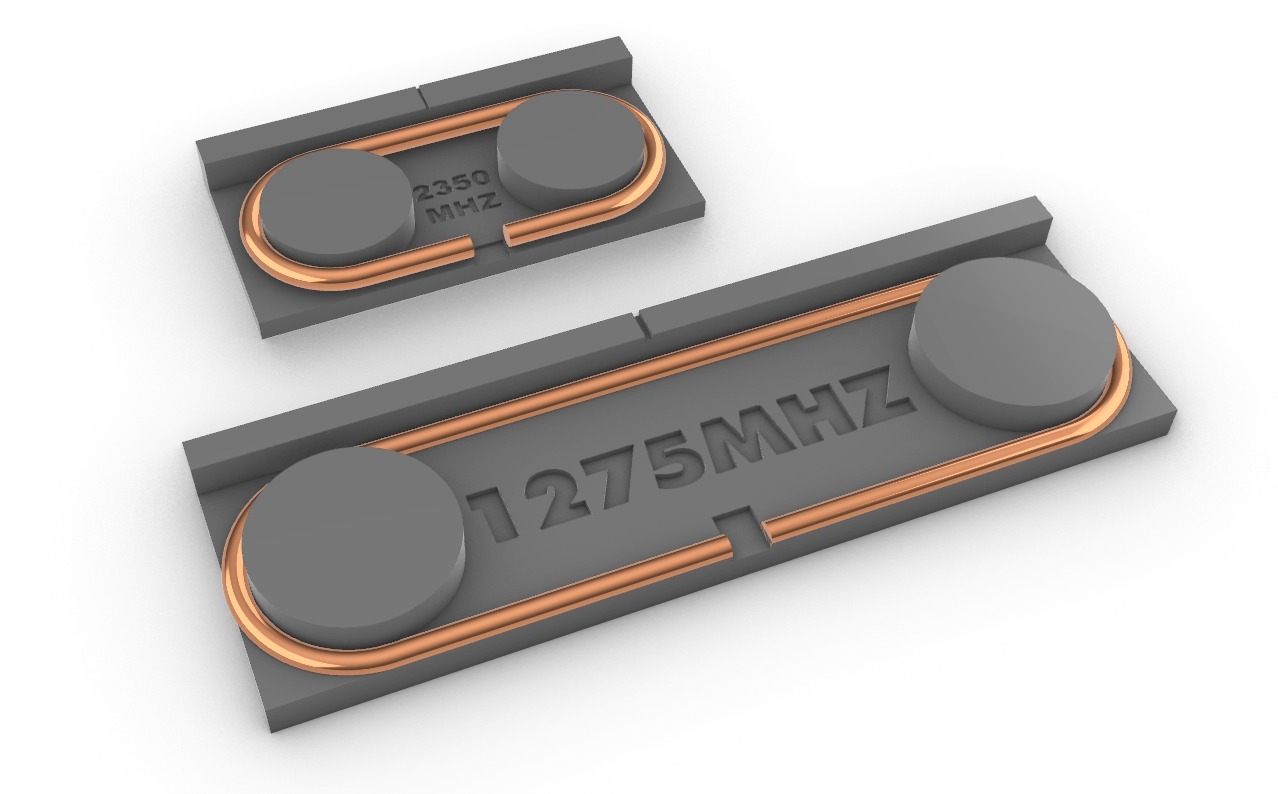
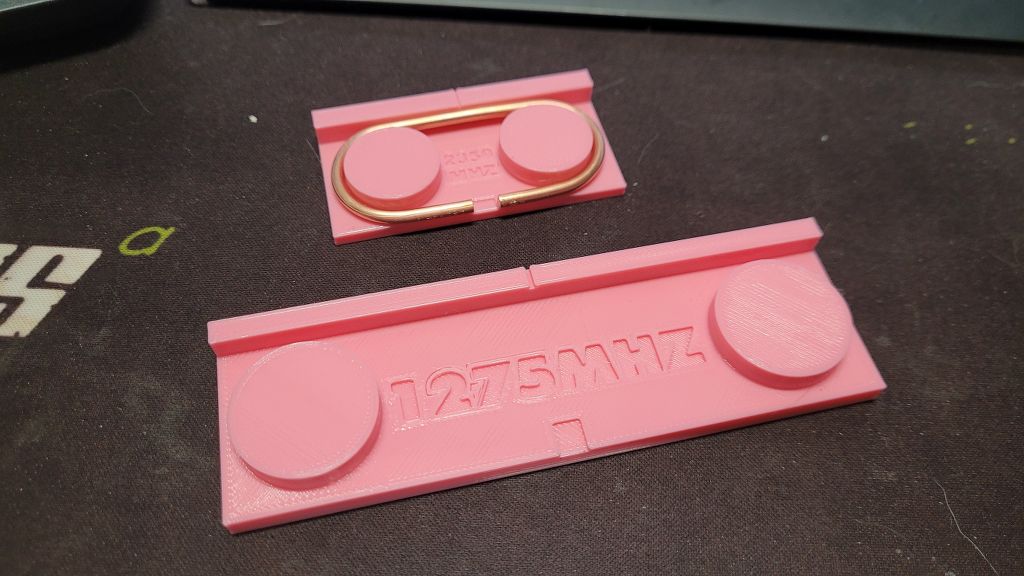
So I drawn a little jig for bending these folded dipoles
DOWNLOADS:
 Universal Bending Jig
For element mounting I used a simple method also used by Tonna.
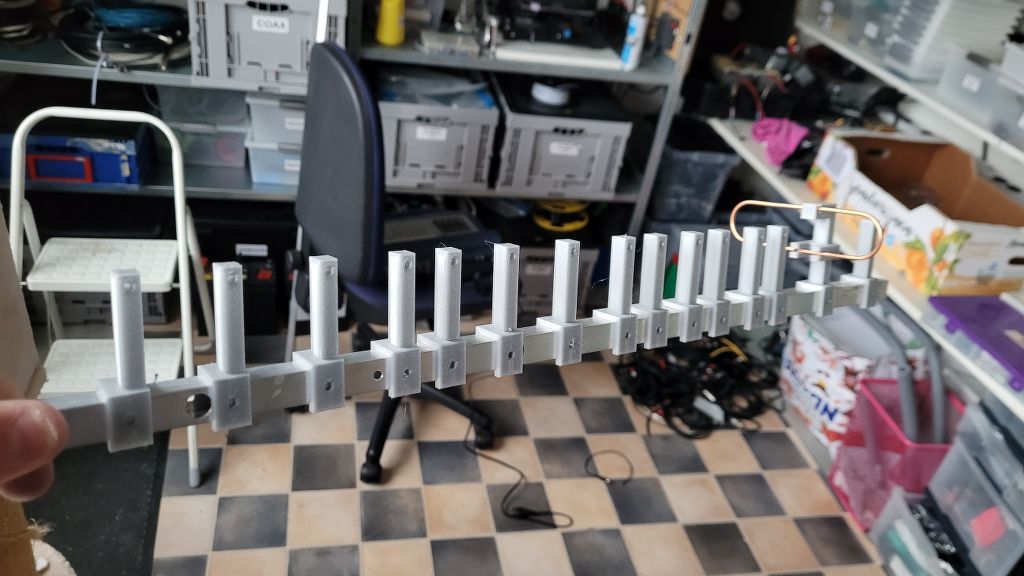
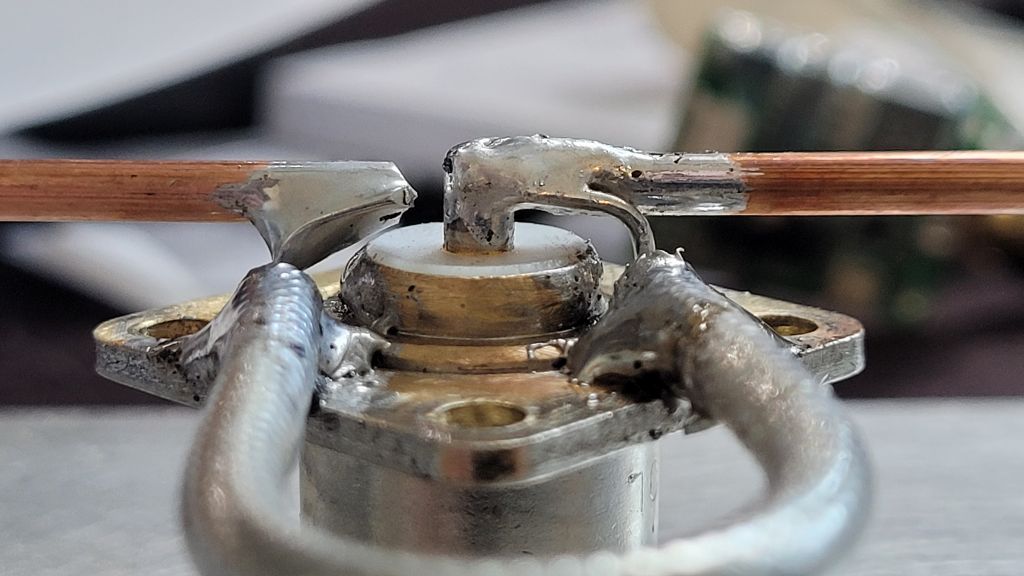
Folded Dipole for 23cm with RG405 as balun, and a short piece of RG58 with a N female connector soldered to the dipole element.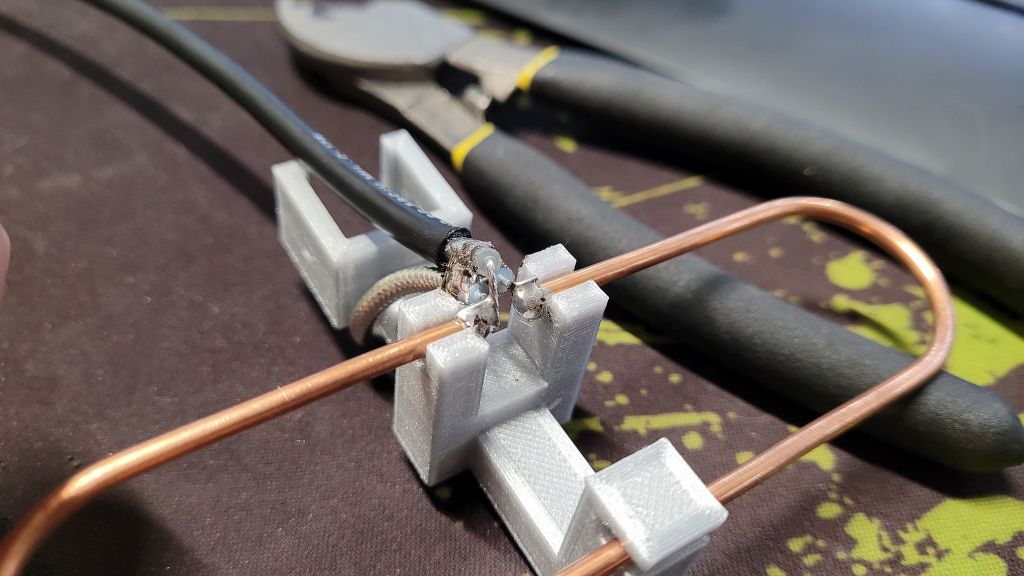
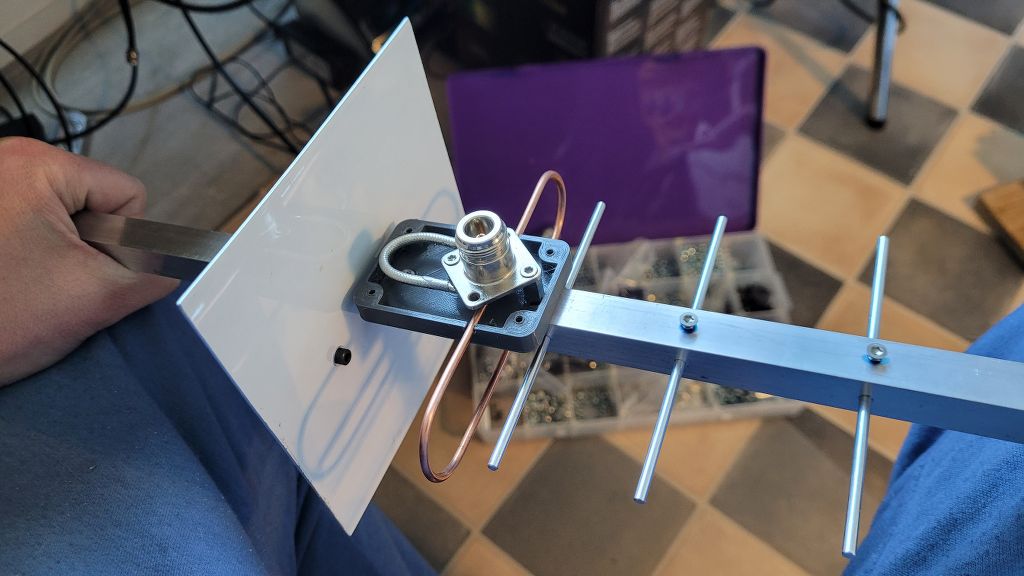
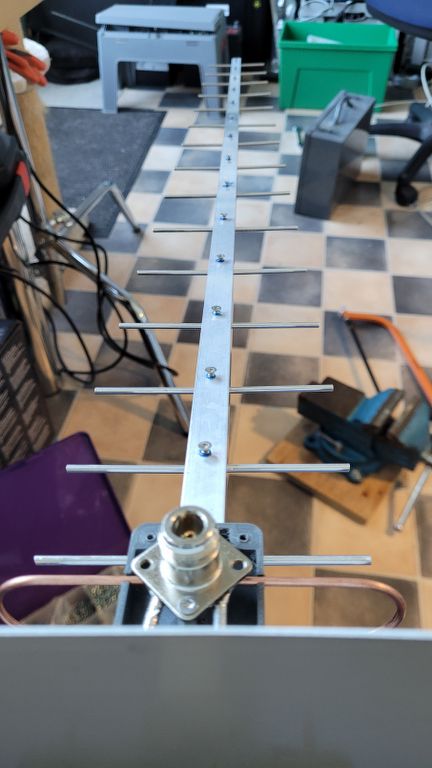
All elements placed a their position, ready for some testing!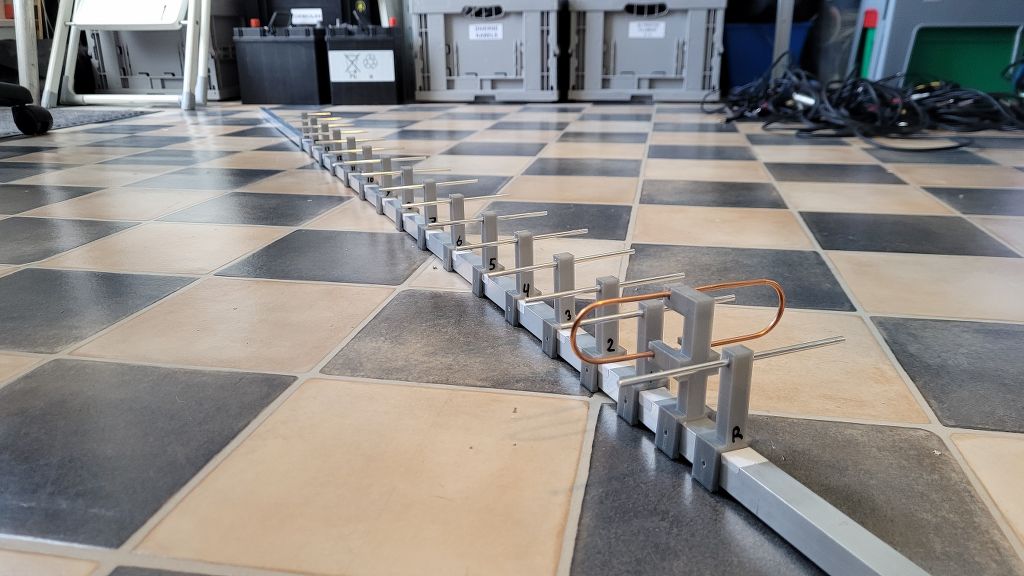
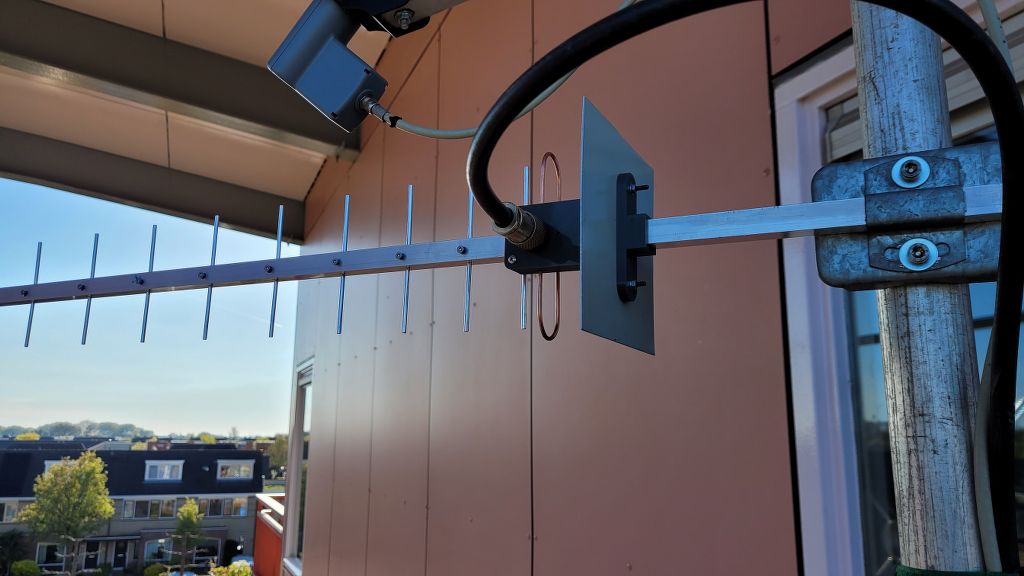
Antenna in my mast, and results are great for a first time build. SWR below 1:1.5 at the resonant frequency. Measured front to back ratio about 16-17dB not bad!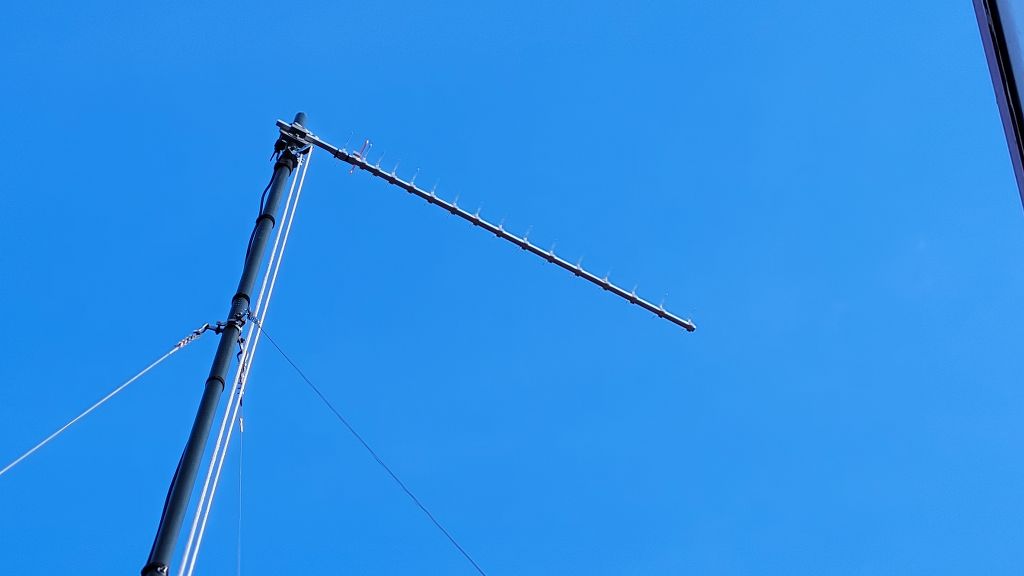
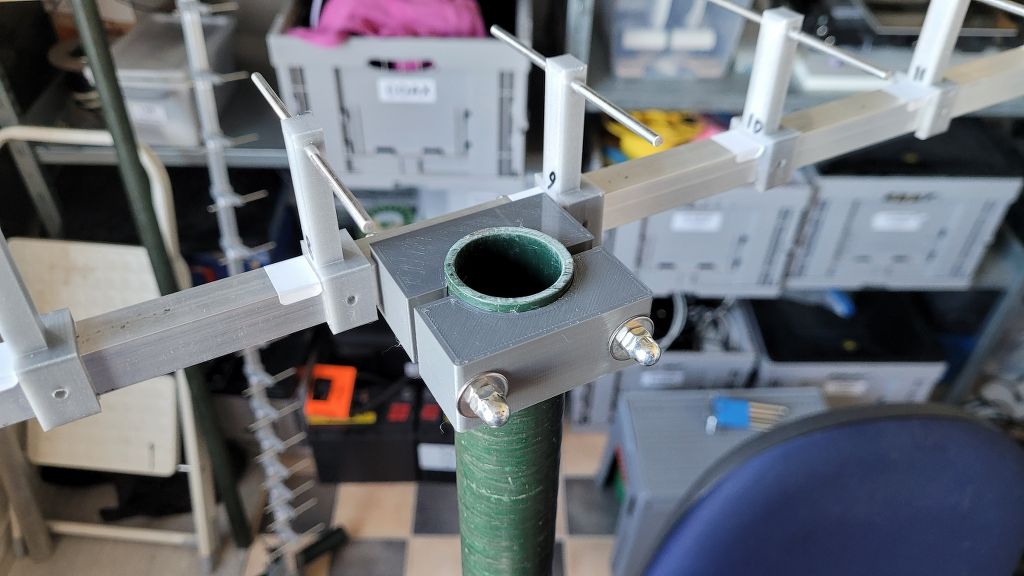
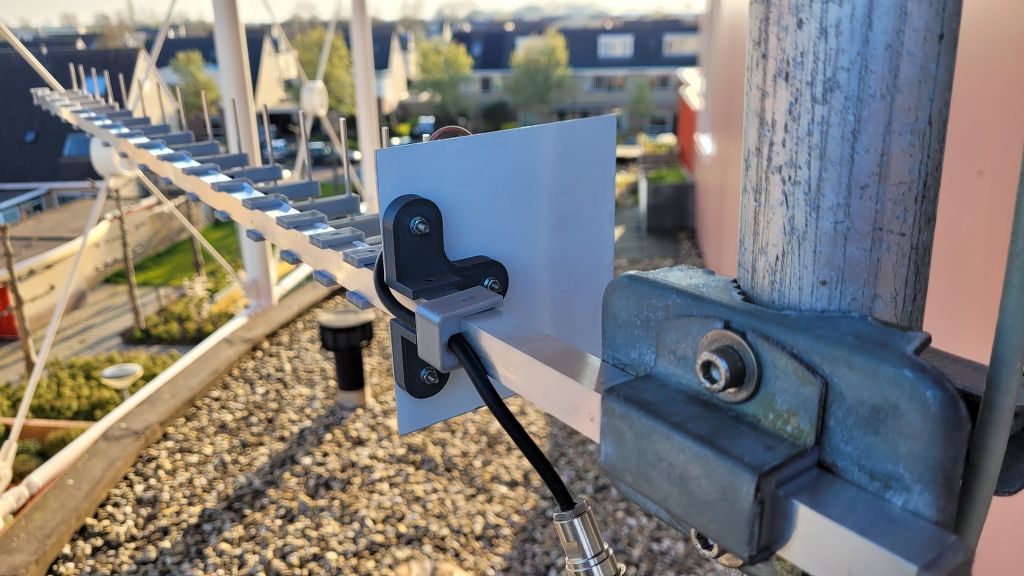
To Minimize the torque windload on the antenna, I 3D printed a Mast clamp to mount in the middle of the boom.
Replacing the reflector
After playing with the 23cm antenna, I was wondering would a real closed reflector like a plate or mesh perform better than one single reflector element?
the idea behind it was that there wouldn’t be much “leakage”, as if it were “looking past” the reflector.
And would a “closed” back work better, more radiation to the front, and less leakage to the rear. And an even better FB ratio?
As a reflector I used a 1mm plate, the square shape is at least the calculated reflector size from the calculator. bigger is ok, smaller is not allowed.
To my surprise this had quite a positive effect!, I got almost 3dB more gain, only the FB ratio remained about the same.
From now on, all yagi antennas for 13 and 23cm that I build will be equipped with a plate/mesh reflector.
23cm V2
I wanted to know if an insulated yagi performs better than an uninsulated version where the elements are through the tree. and/or the tree disturbs the radiation pattern in such a way that it would perform less.
For this reason I calculated a new one with the calculator, with exactly the same number of elements and frequency.
Since the mounting of the dipole is somewhat different, I dived into my CAD program again and made a design how to attach the dipole to the boom.
DOWNLOADS:

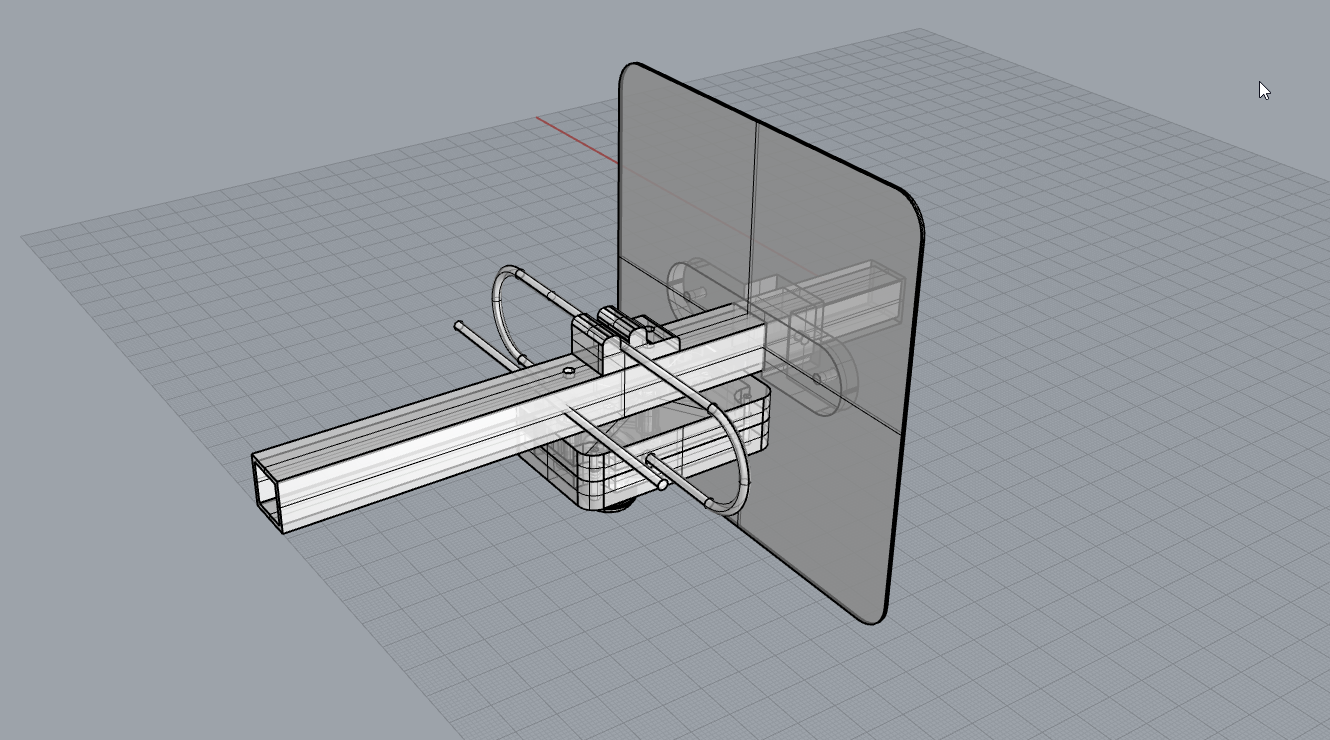
After drawing and printing it was time to build the antenna.
First soldering the balun to the dipole and N connector.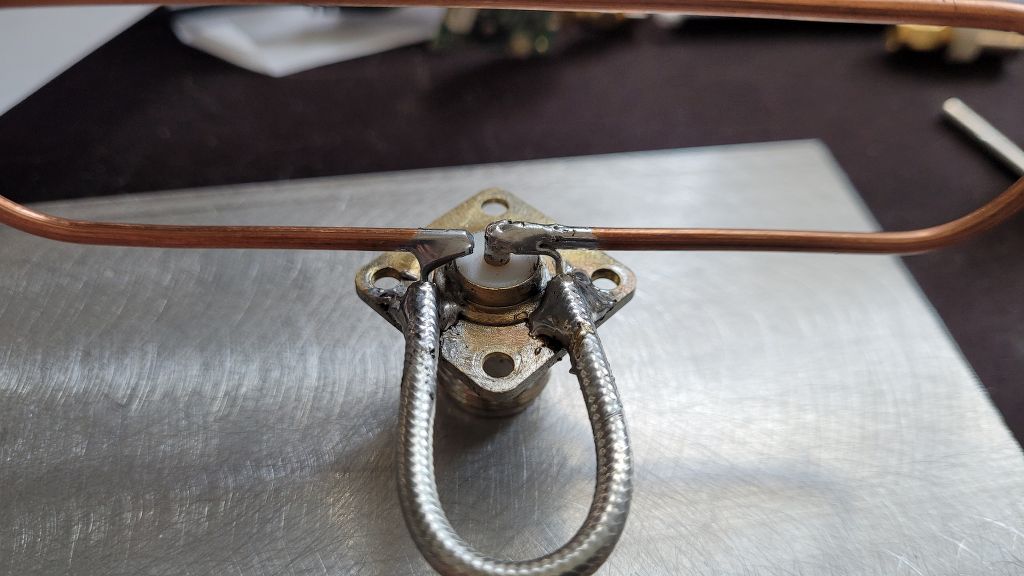
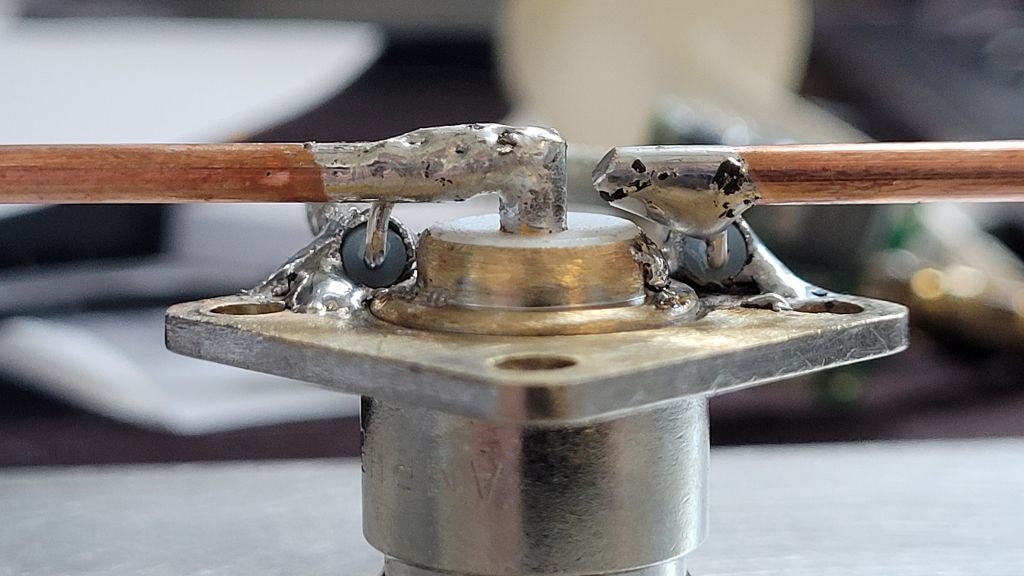
Soldered dipole in place with 3D printed enclosure, and mounted on the boom.
All elements in place
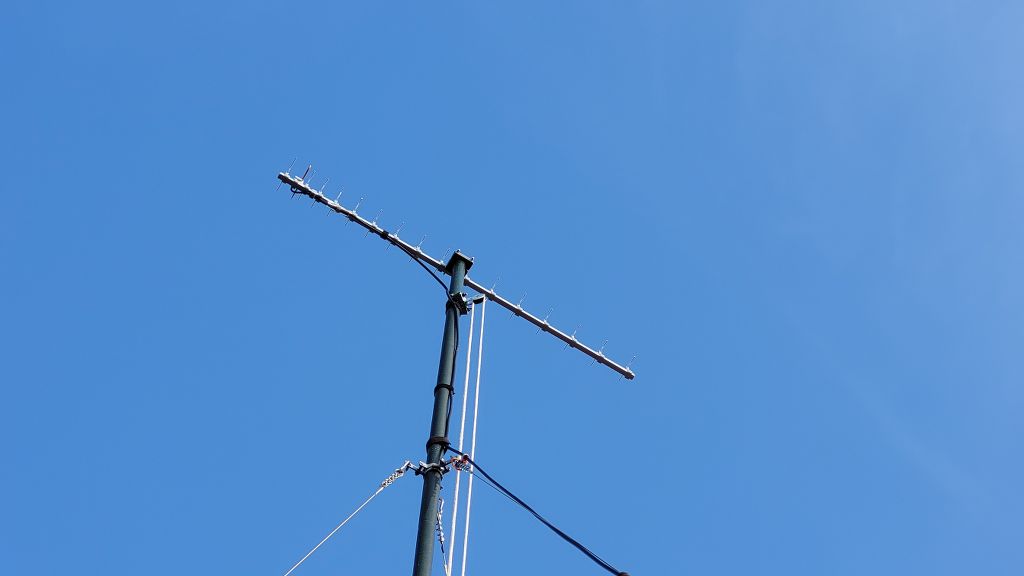
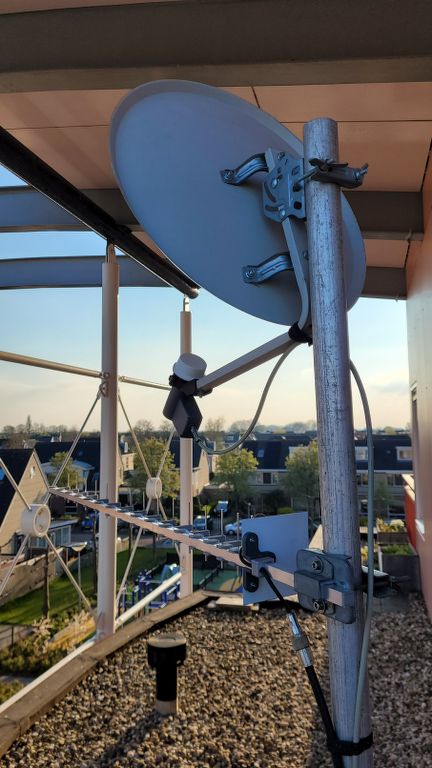
Antenna placed in the mast.
Results!, practicly the same as the insulated version, gain and FB ratio the same.
For future I would advise to build this type for 23cm, as it is mechanically much stronger.
And if you look closely at the design, 3D printed parts are not necessary at all. It is important that the node on the dipole/balun/connector is properly sealed with a dielectric sealant.
and the reflect can be fixed with 2 aluminum corner pieces.
Great write up. I’m trying my first build for 23cm. Do you have any tips you can share on how to tune it. Mine is showing it’s resonant on 1.336ghz rather than the 1.296ghz I’m targeting.
I downloaded the “13-23cm_Yagi_Parts_15mm_Boom”. However the 1275Mhz jig appears to be missing the bend cylinders on either end. Is there another STL available with these at the right positions? Thanks and great work!
I printed v1 as well and the 1275 jig was also missing the posts for bending. I am printing the universal bending jig now. Cant wait to build this and try it, great addition to my 2m / 70cm tower setup for the IC9700 stack.
STL File is updated, should be ok now.
73
Bjorn PD5DJ
My first steps into 23cm begins right now, this post is just great!!! Thank you! 73 Jo OE6VIE