Skip to content

PD5DJ

Amateur Radio Station

Menu
  • Home
  • Info
    • Info
    • History
    • QSL Information
  • MiniBook Guide / Gids
    • MiniBook
      • Handleiding MiniBook
      • MiniBook Guide
      • Install MiniBook
      • MiniBook main window
        • MiniBook My Station / My Activation
        • MiniBook QSO Field / Veld
        • MiniBook – Activation reference input / Activatie referentie invoer
        • MiniBook DXCC & QRZ Lookup
        • MiniBook Worked Before window / venster
        • MiniBook – Status & Buttons
        • Special Functions / Speciale functies
    • Hamlib Server
      • HamlibServer Setup
  • XLX880 Reflector
  • Activations / Contesting
    • Fieldday Juli 2th – 2017 with PD5TG
    • Mills on the air 2016
    • PI4WFL/KITE June 6th 2016
    • PACC Contest PA6NH – 2015
    • VHF Contest 2006 – Petten
  • Projects
  • For Sale/Tekoop
  • Contact
Menu

Fixing 10/11m 5/8 Vertical

Posted on May 21, 2024May 21, 2024 by pd5dj
5
(4)


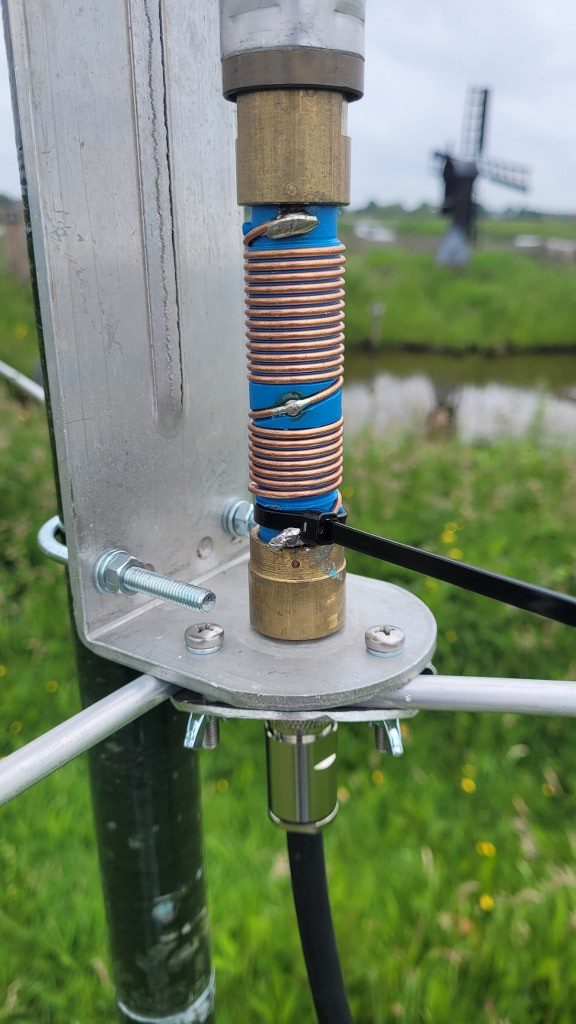
During a field activation I noticed that my 10m 5/8L Vertical occasionally performed poorly.

I soon discovered that a solder contact had broken loose. Probably due to transport.

With some trickery I was able to temporarily solve this problem.

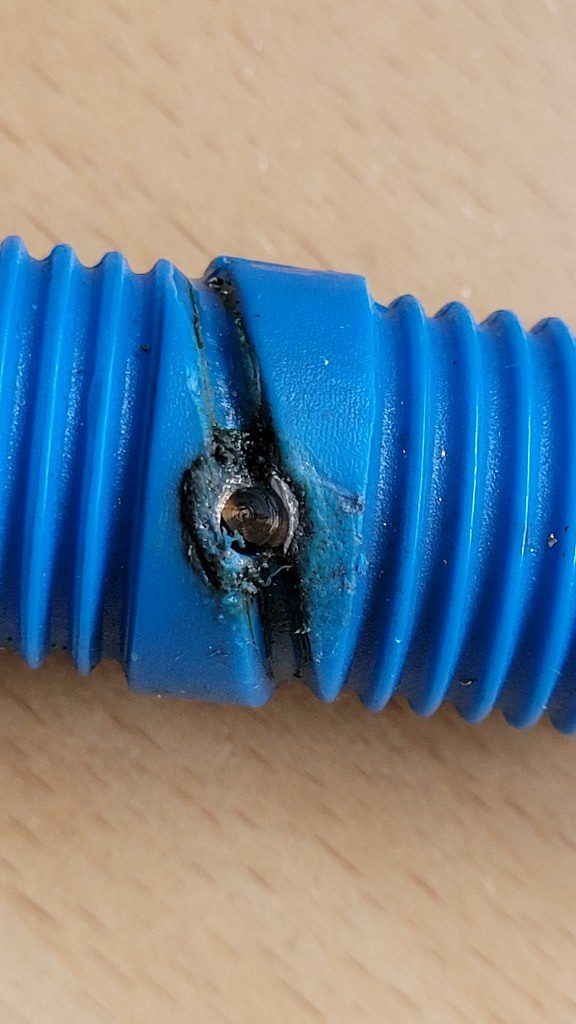
When I got home I soon discovered that there was more going on.

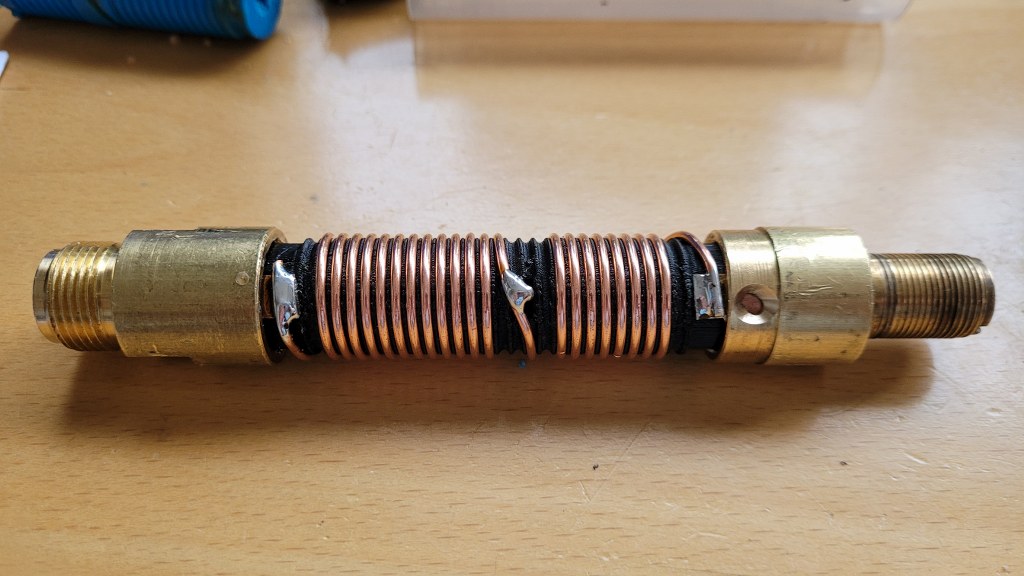
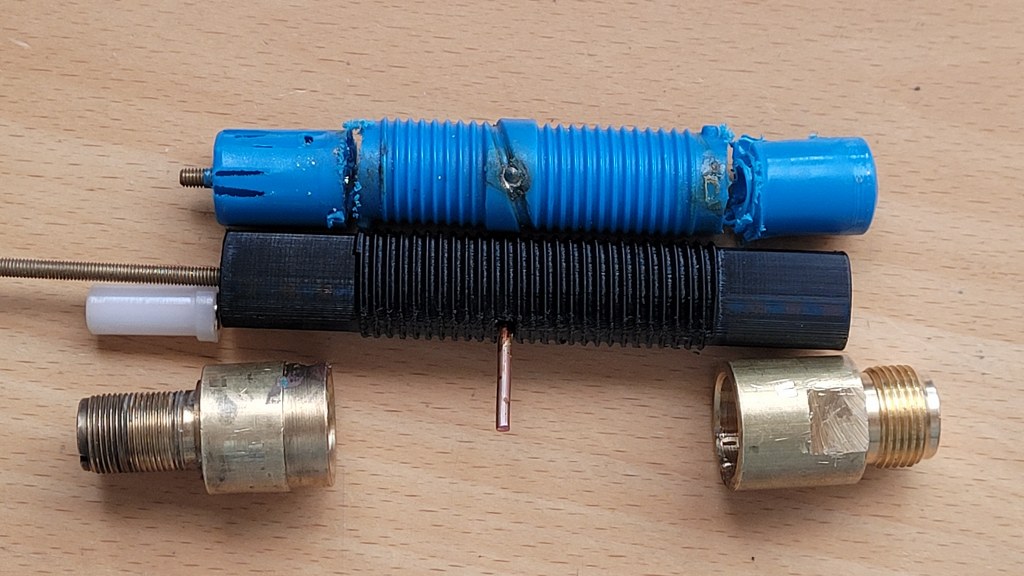
The center pin of the PL connector no longer had contact at the junction of the 2 windings.

This was a really bad point to fail as it came loose inside the plastic holder.

There was no other option than to make a holder yourself.

Since I now have a lot of experience with drawing and 3D printing rigid objects, this method was the most obvious choice.

I quickly made a CAD drawing of the holder including the threading of the copper wire to be wound.

I just had to find a method to get the M4 threaded rod out of the holder.
I used a brass M4 nut and soldered a piece of 3mm copper wire to it.


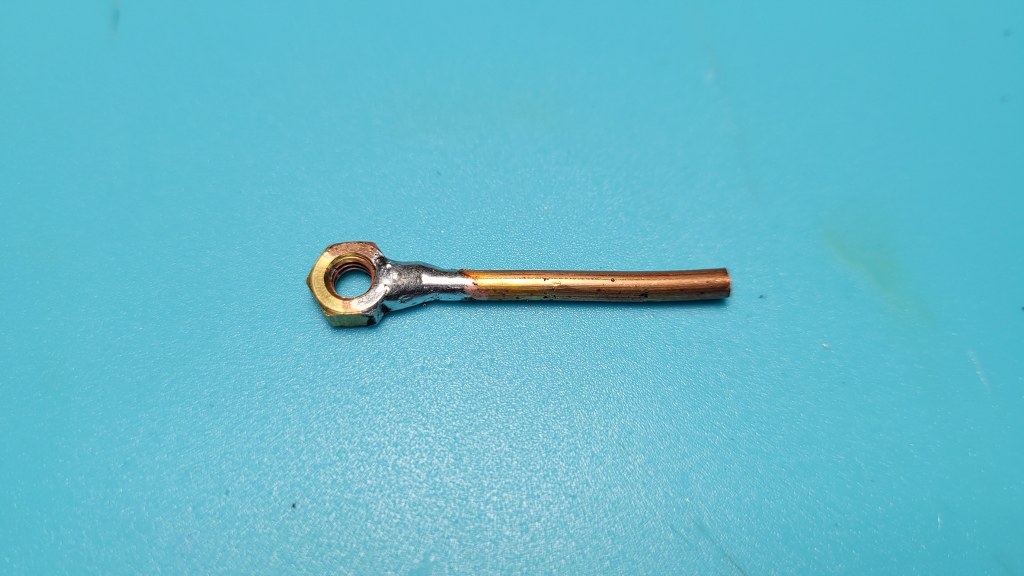
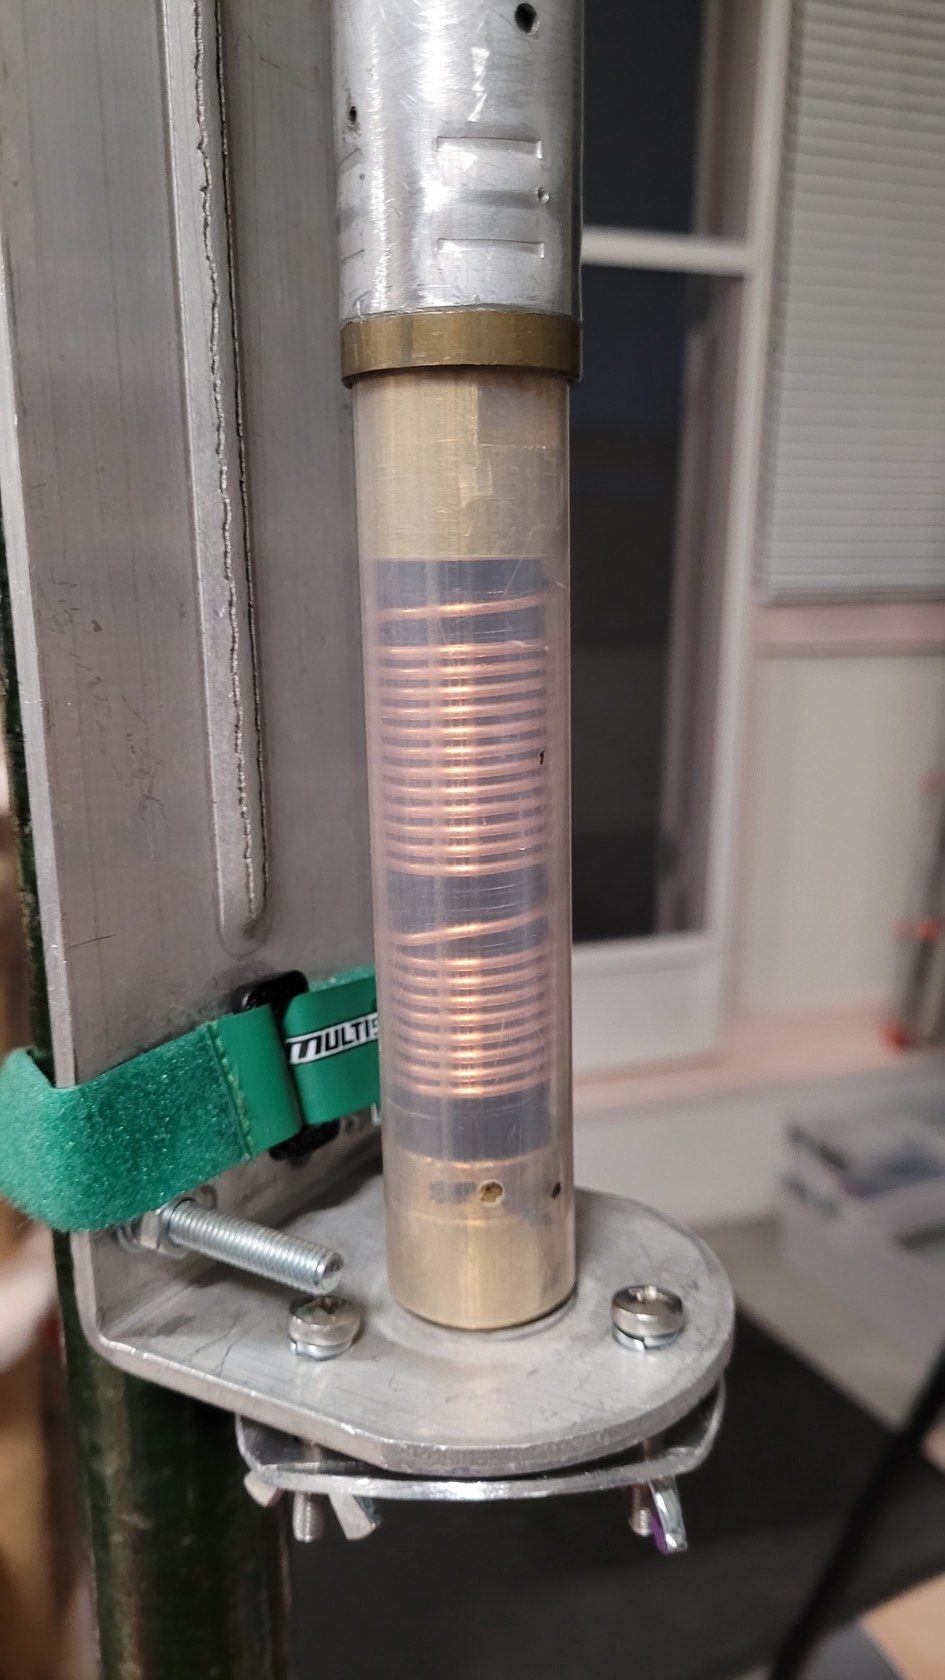
The center pin of the PL connector was screwed to the holder with M4 thread, this thread runs through the holder to the junction of the 2 coils.

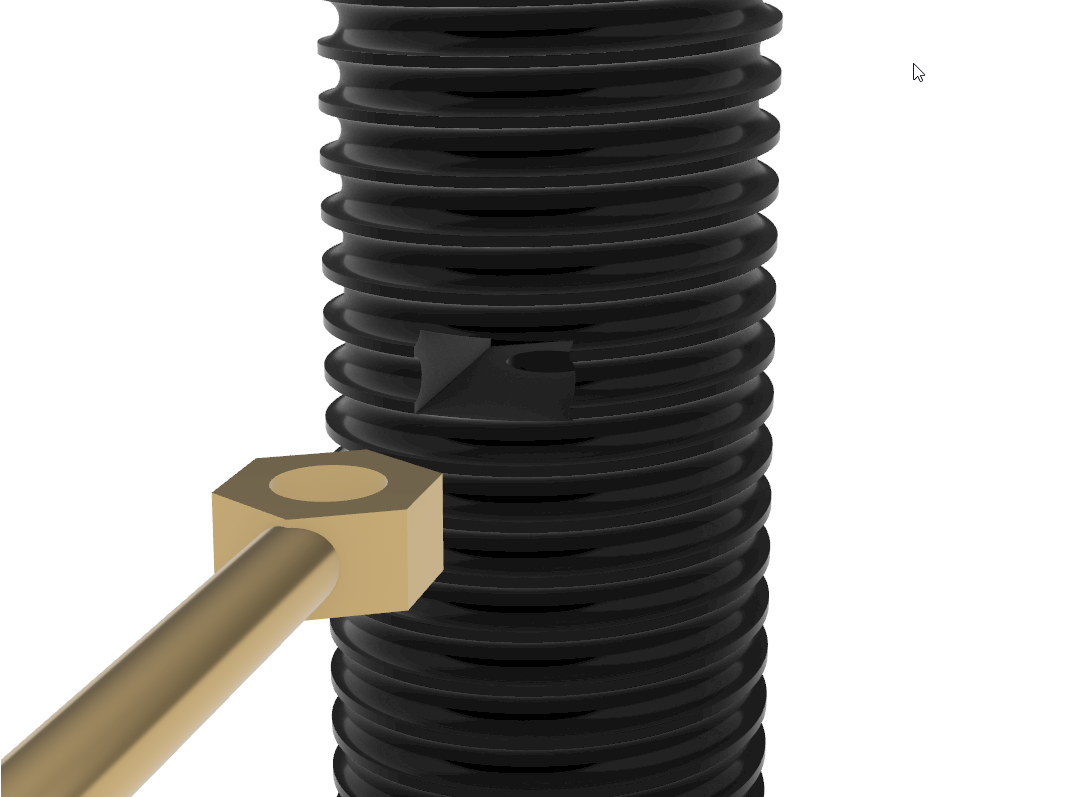
I also used the same method in my drawing.

I have drawn the holder almost 1:1, also with the exact dimensions and spacing of the windings of the coils.

In the drawing I have made a slot in the holder where the nut with copper wire can be slid.
This ends exactly in the heart of the holder.
This way I can easily screw in the M4 threaded rod.

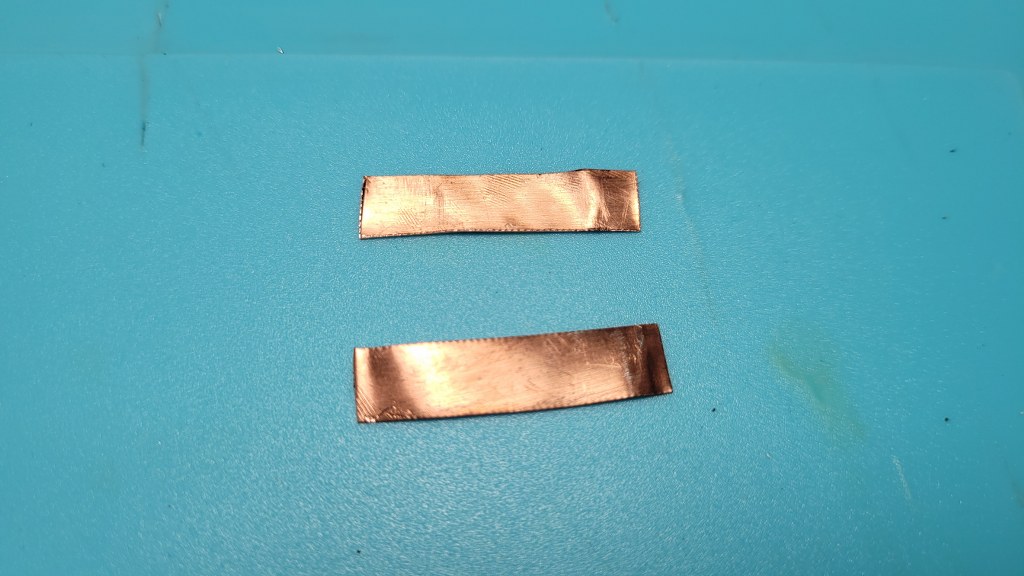
I also made 2 new pieces of copper strip and pressed them back onto the new holder together with the 2 brass bushings.

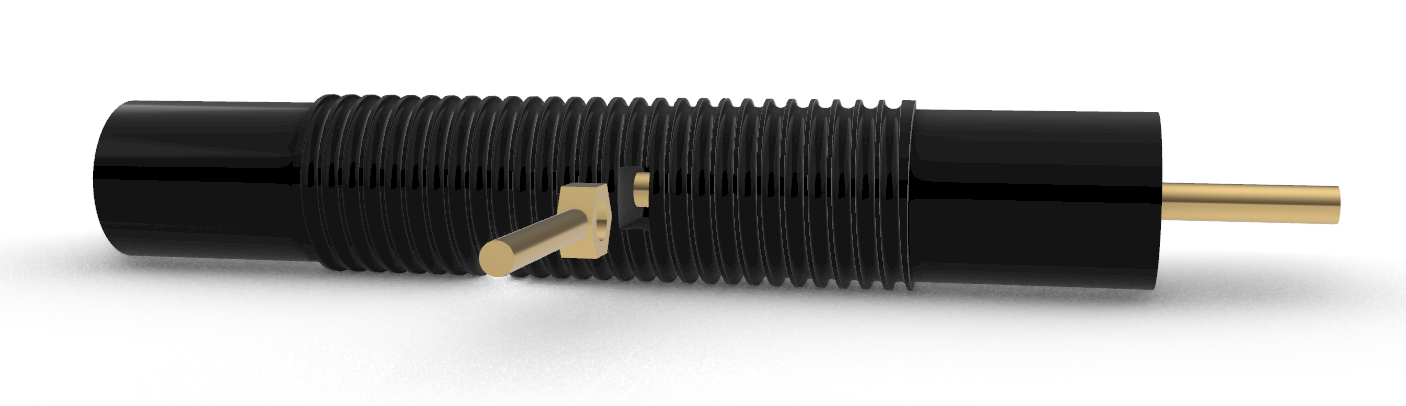
I printed the holder horizontally. This is to maximize the forces exerted on the antenna and printed holder over the vertical length of the holder.

Rewound the coils and done!


How useful was this post?

Click on a star to rate it!

Average rating 5 / 5. Vote count: 4

No votes so far! Be the first to rate this post.

We are sorry that this post was not useful for you!

Let us improve this post!

Tell us how we can improve this post?

Leave a Reply Cancel reply

Your email address will not be published. Required fields are marked *


Latest Posts

  • Tutorial : Yaesu bluetooth interface pairing in windows
  • YAESU Bluetooth Interface
  • Frame build for Yaesu FTdx10
  • Fieldday weekend and visit to PC5T on TEXEL EU-038
  • V Dipole 40m Expansion kit

Catagories

  • Accesoires
  • Amateur Television
  • Announcements
  • Antennas
  • Contesting
  • Digimodes
  • Events
  • Homebrew
  • Info
  • Logbooks
  • Measuring
  • MiniBook
  • Packet Radio
  • Portable
  • Projects
  • Propagation
  • Refurbishing
  • Satellite
  • Software
  • Uncategorized

Archives

  • October 2025
  • September 2025
  • August 2025
  • June 2025
  • May 2025
  • April 2025
  • March 2025
  • January 2025
  • November 2024
  • October 2024
  • September 2024
  • August 2024
  • July 2024
  • June 2024
  • May 2024
  • April 2024
  • March 2024
  • November 2023
  • October 2023
  • September 2023
  • August 2023
  • July 2023
  • June 2023
  • May 2023
  • April 2023
  • January 2023
  • December 2022
  • October 2022
  • August 2022
  • July 2022
  • June 2022
  • May 2022
  • April 2022
  • March 2022
  • August 2018
  • July 2018
  • June 2018
  • May 2018
  • April 2018
  • March 2018
  • December 2016
  • November 2016
© 2025 PD5DJ | Powered by Superbs Personal Blog theme